An introduction to the Digital Doodle Diary
…a freeform, template-free digital bullet journaling in Notability for beginners (even if your drawing or handwriting stinks)
The freeform digital bullet journal, also known as the Digital Doodle Diary, is perfect for anyone who wants to exercise their creativity daily in their digital bullet journal. With this method, you don’t have to pay for templates or fuss to create and draw your own templates every day, week, or month.
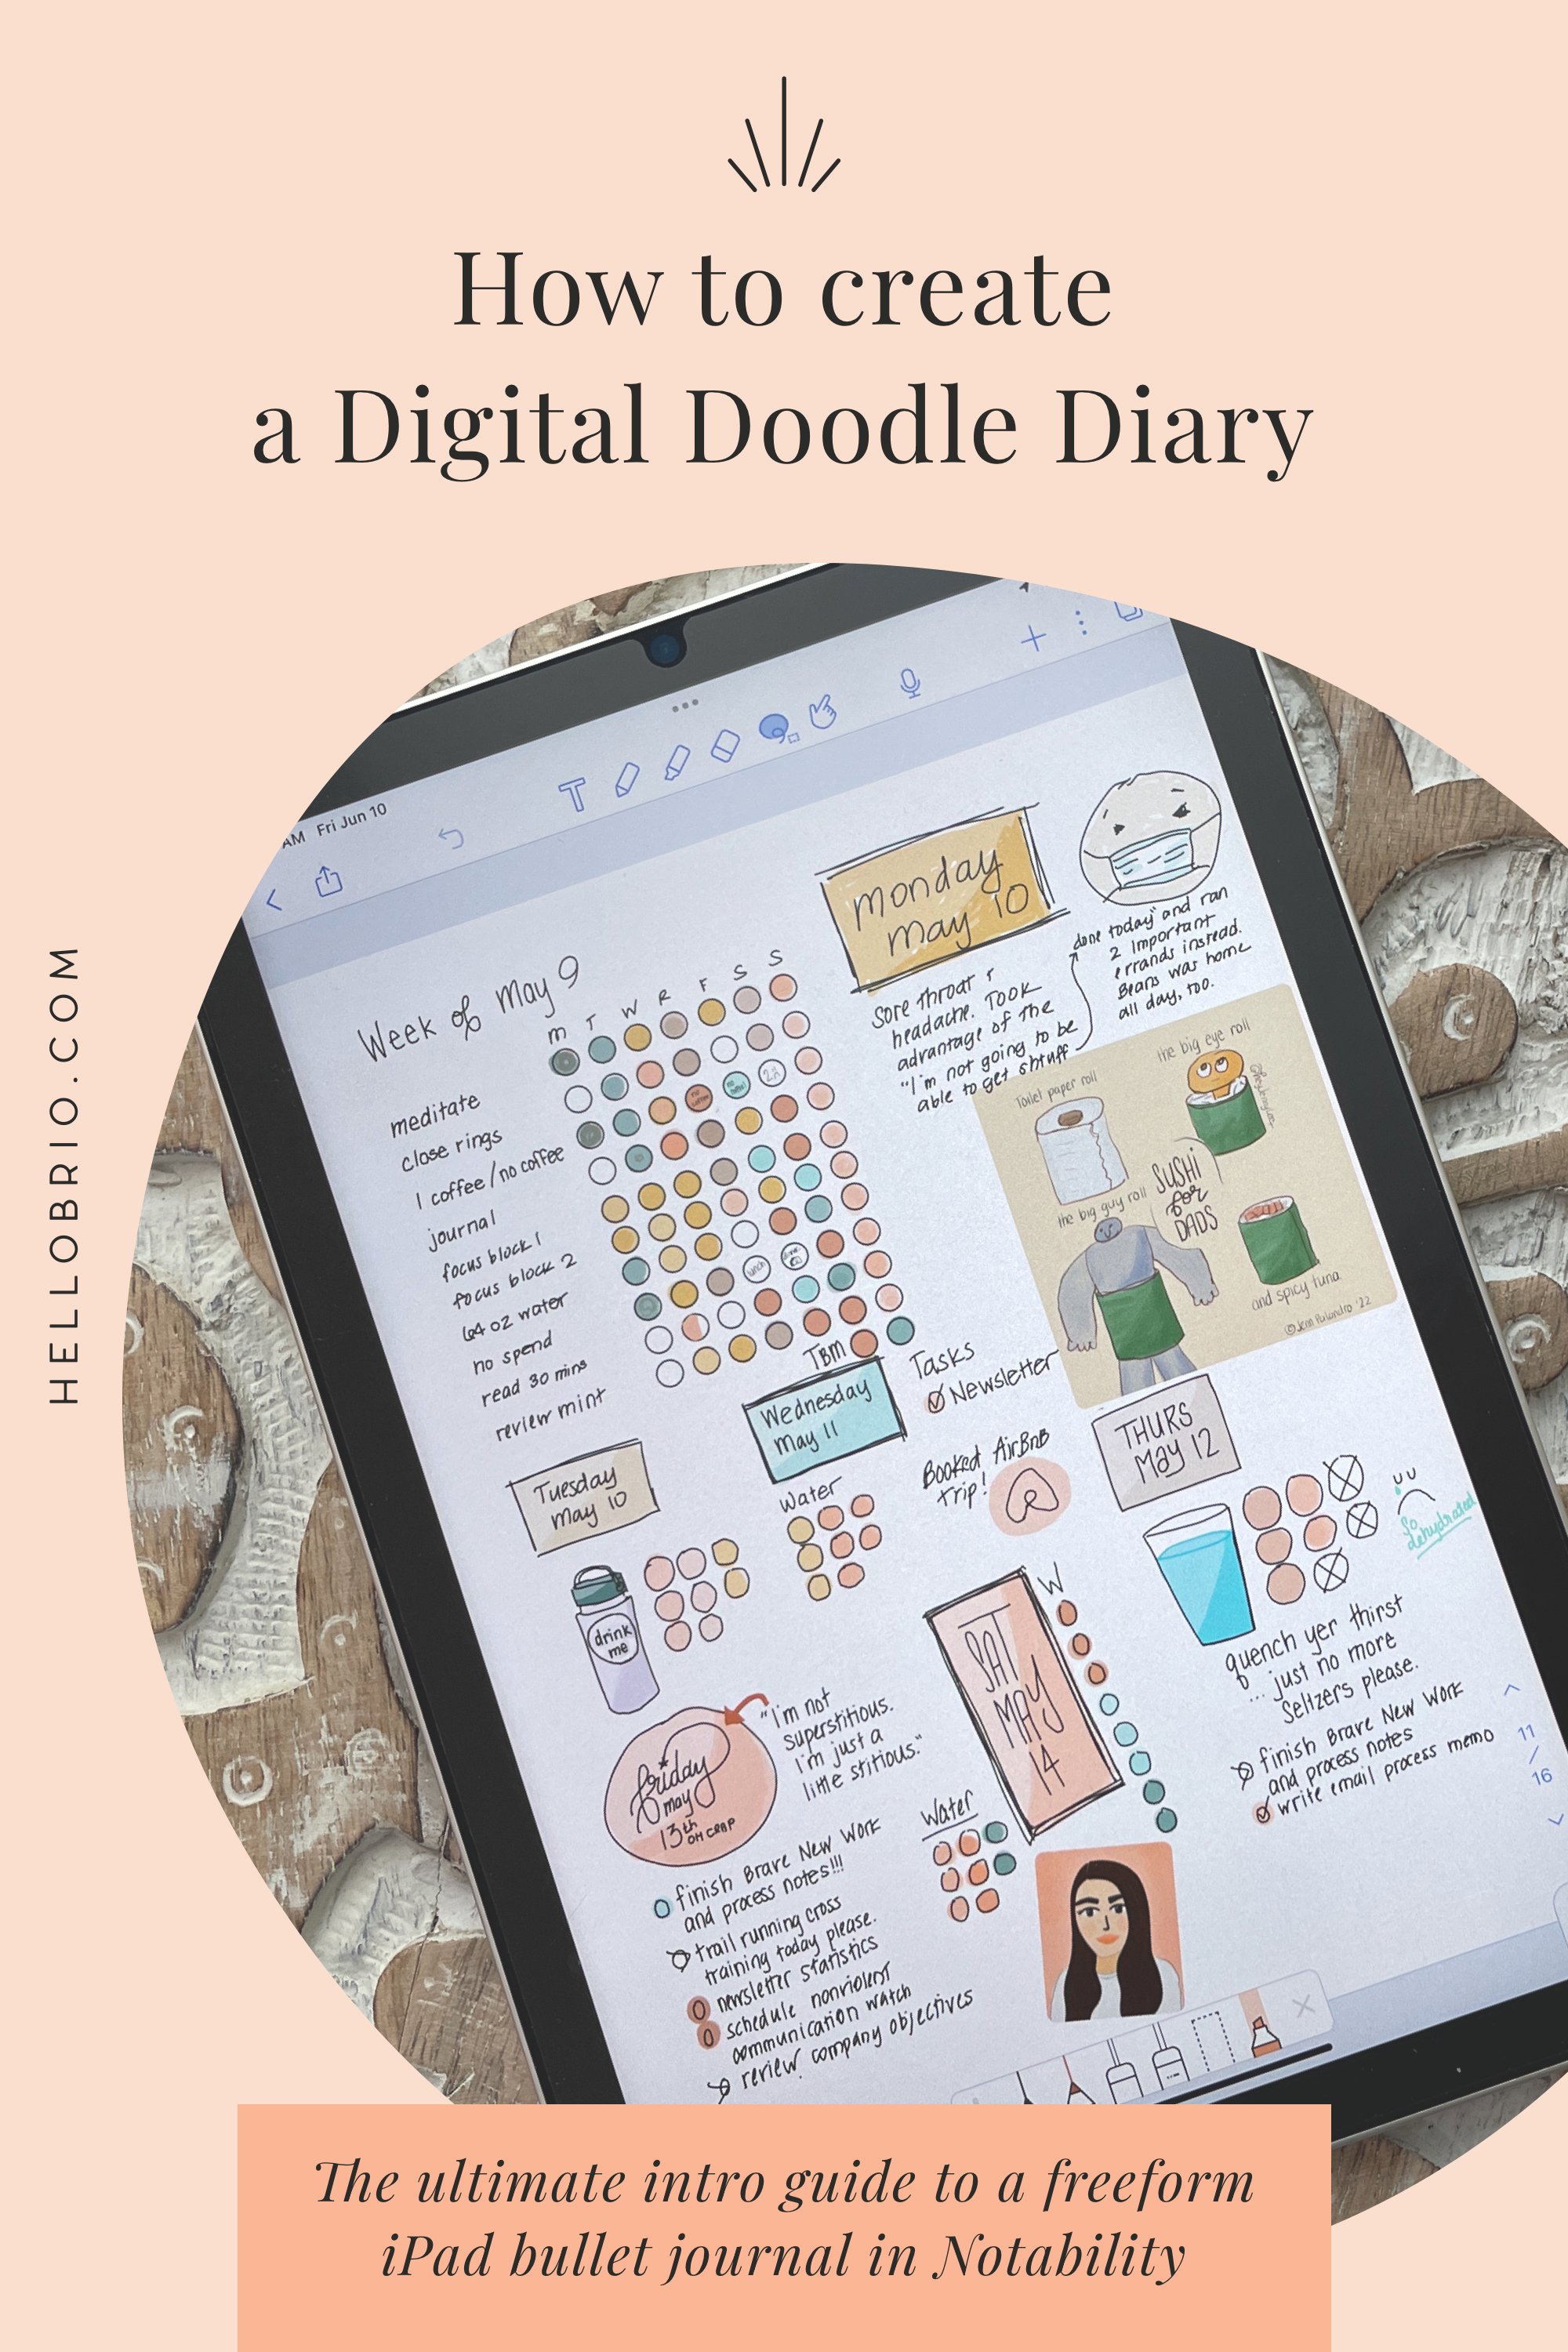
In this post, I’ll share everything you need to know to get started with your freeform iPad bullet journal in Notability—whether you’re a beginner to bullet journaling or Notability—or a seasoned digital planning pro.
Use these links to skip around if desired:
Thoughts about a digital bullet journal versus an analog one
13 Reasons to start a freeform digital bullet journal (so many benefits!)
In general, the bullet journal is a revelation for anyone who is sick of pre-made planners. You can just start a bullet journal no matter what your circumstances, as long as you have access to a notebook—any notebook—and any pencil or pen.
And the next level up? Digital bullet journaling.
Digital bullet journaling is key for flexibility, portability, and creativity (with the power of an undo button). Your journal syncs across all of your devices, allowing you to draw it on your tablet and have it sync to your computer or even your phone for quick reference.
And freeform digital bullet journaling, also what I dubbed as the Digital Doodle Diary, is even better! It brings out so much extra room for creativity without the constraints or configuration of templates.
Side note: Digital Doodle Diary evokes an all-too-feminine experience, but alliterations make me happy. Agree? Disagree? Let’s tweet about it. Though I will say that Anne-Laure LeCunff picks Digital Doodle Diary, so I’m good with that 😍
Thoughts on an analog (paper) bullet journal versus a digital bullet journal on the iPad
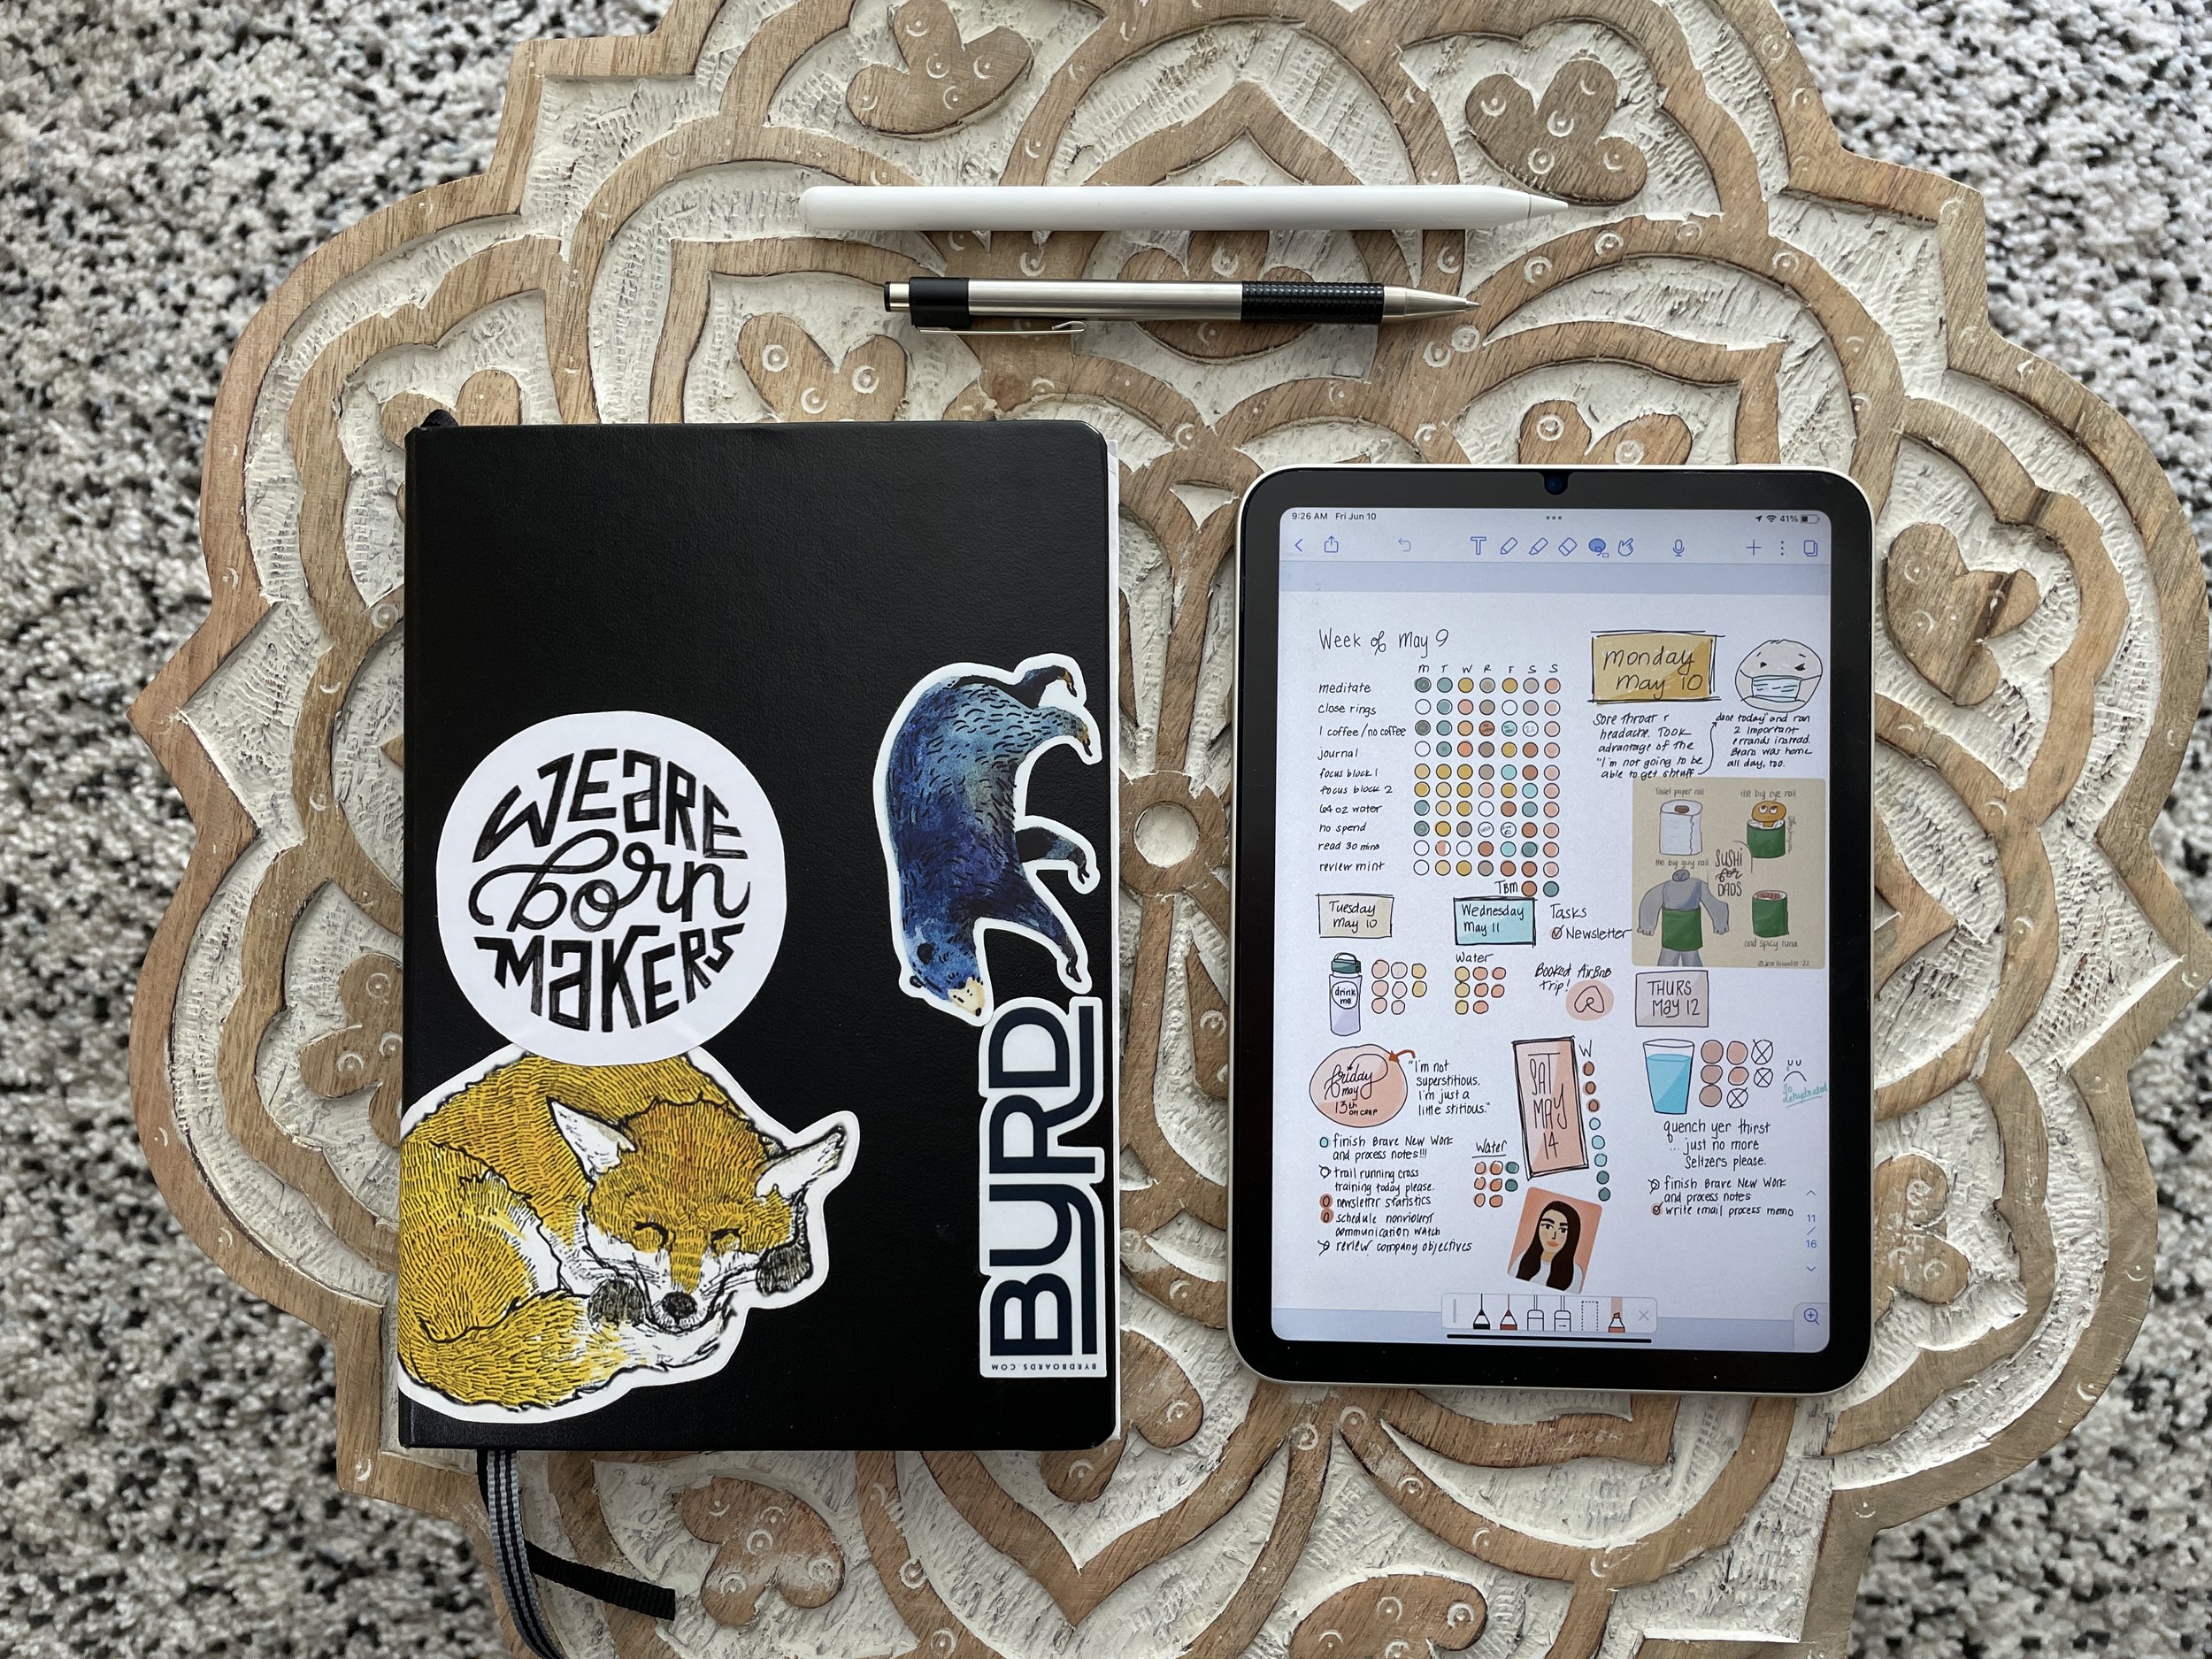
As a seasoned bullet journaler since 2016 (really? As if I didn’t already feel super old), I hopped back and forth between paper and iPad. Several times. I see the benefits of both acutely.

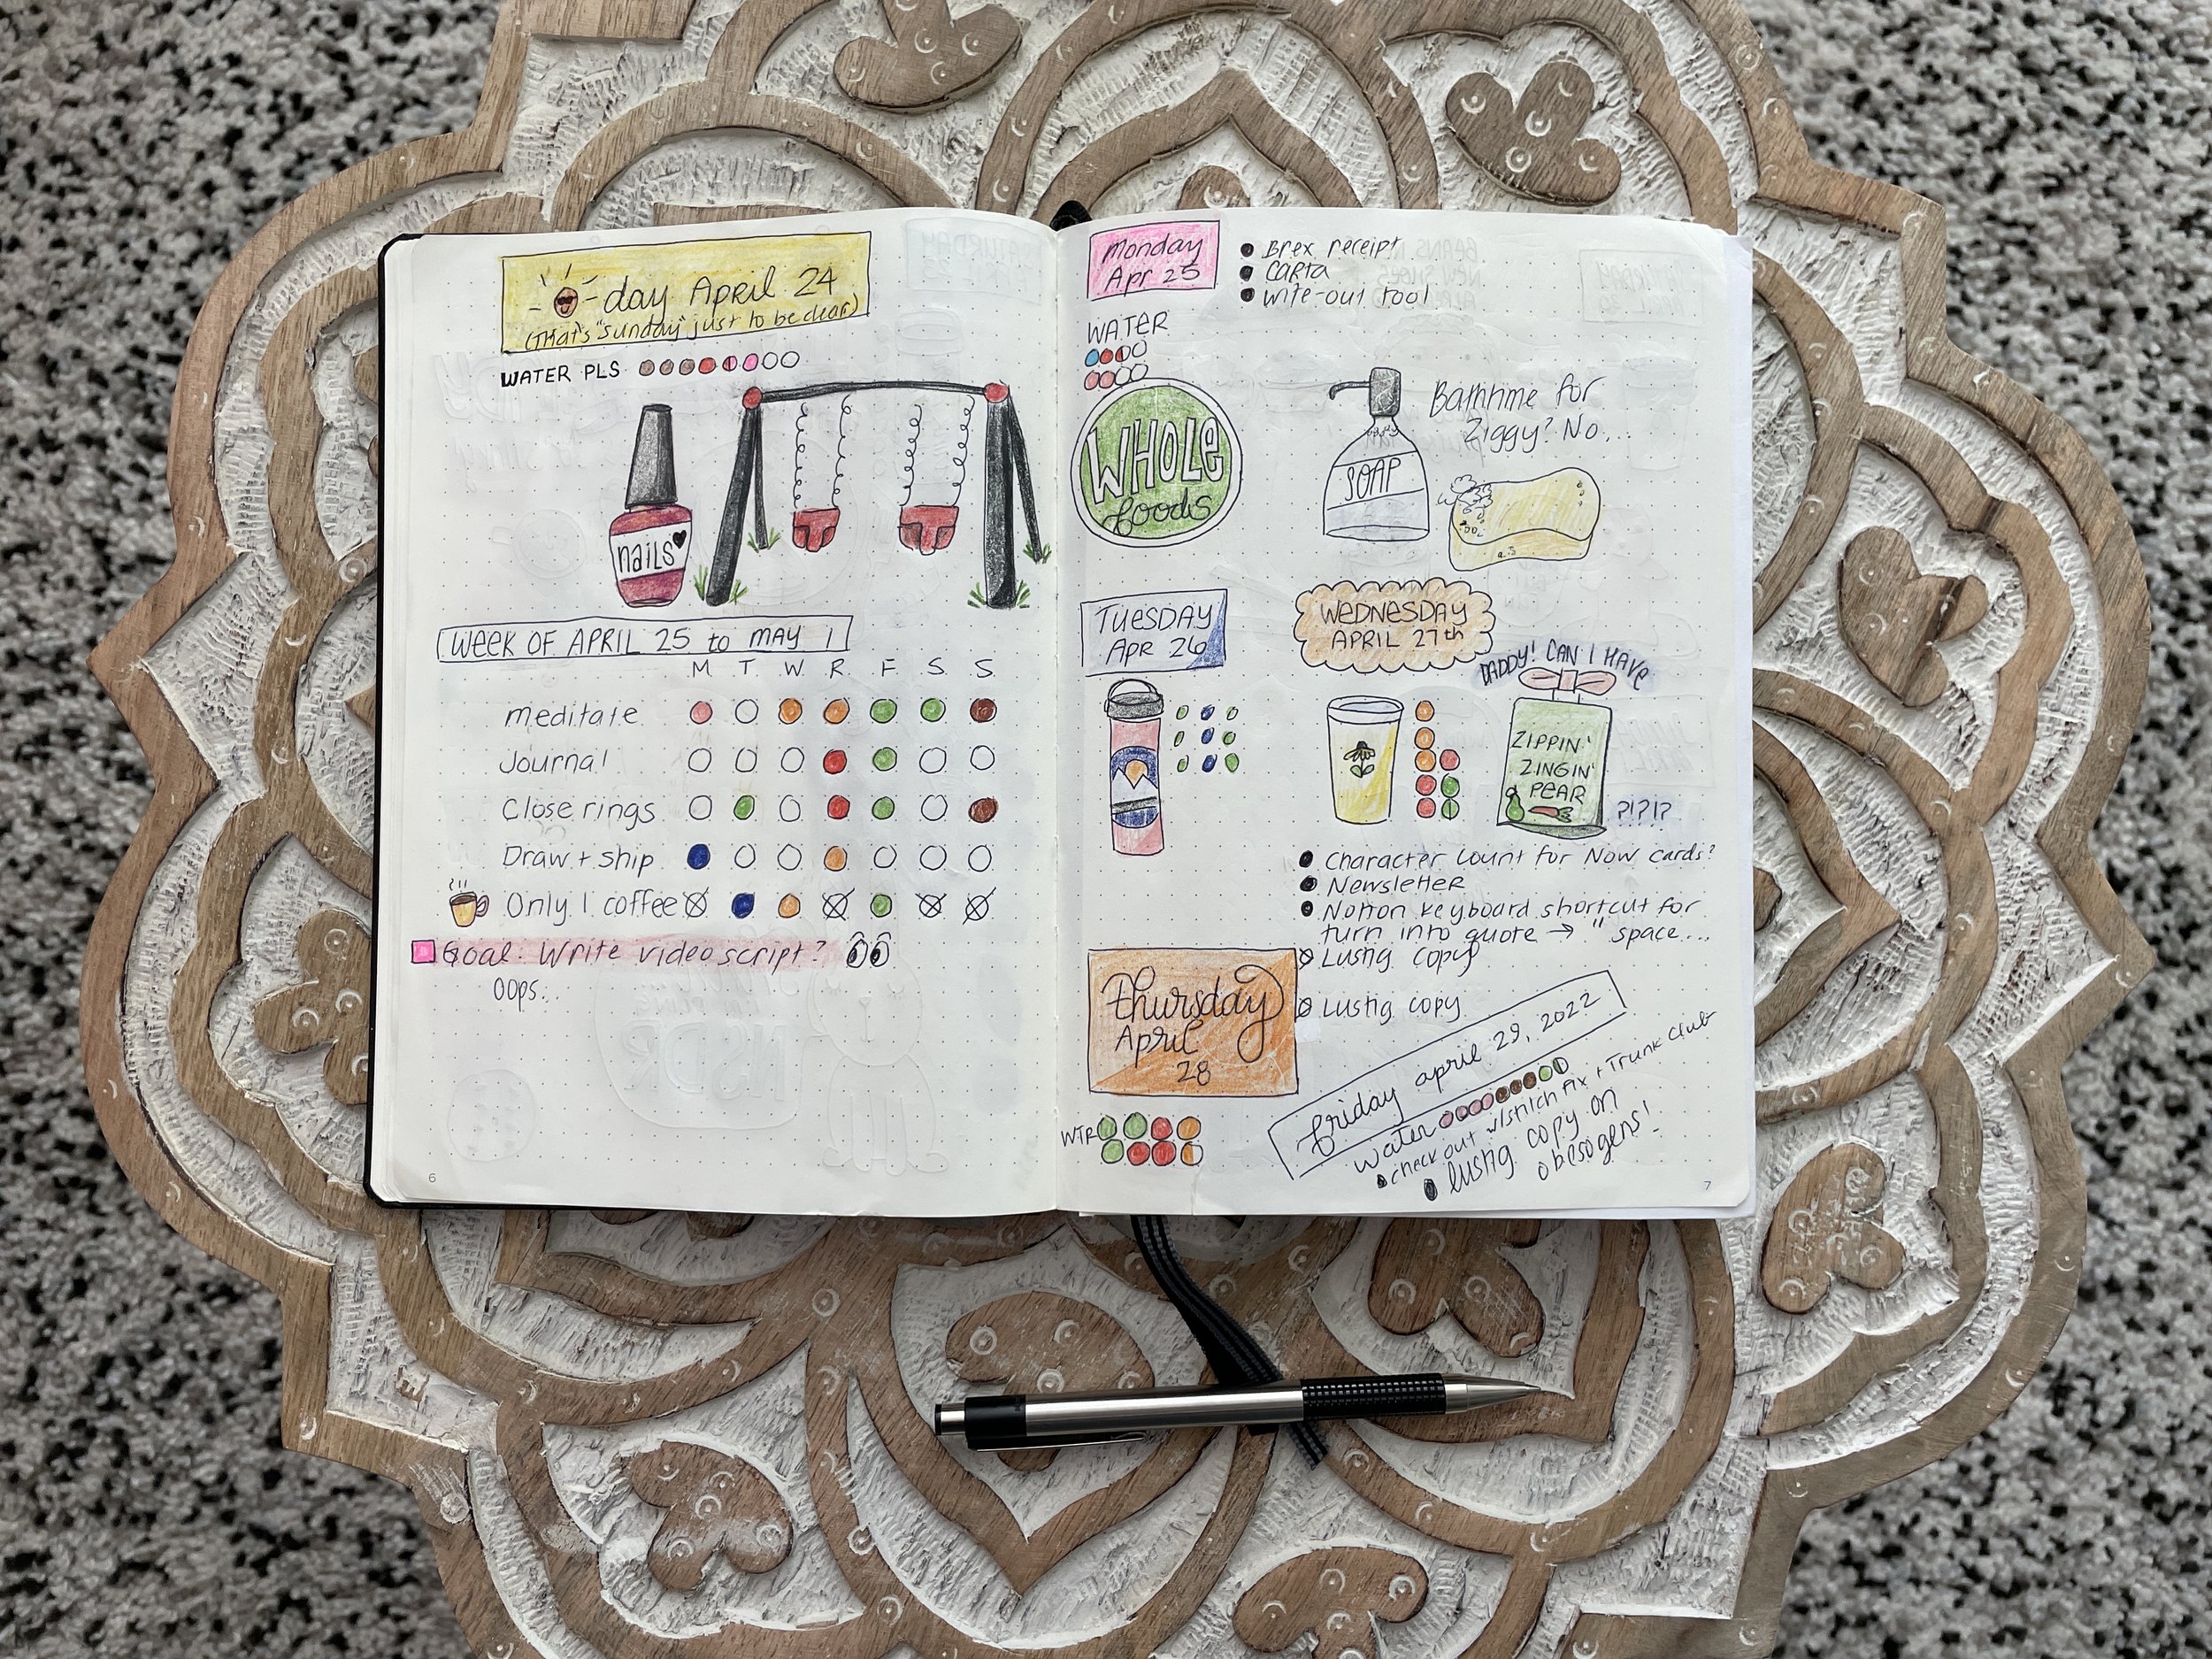
In my experience, I notice when I grab a paper bullet journal and some favorite pens and stationery, it gets me out of a bullet journal rut. And even more importantly—it can get me out of a creative rut. This may also be due to the fact that it gives me an excuse to run to Michael’s and Blick Art—at every chance I can find—to stock up on endless colored pencils and cute stickers and washi tape. I’m a sucker for stationery and art supply shopping.
When it comes down to it? I love the portability, security, and flexibility of a digital bullet journal.
I have every color of pen and highlighter at my disposal, and there are so many great digital resources out there to supplement my experience. Plus, I can create my own stickers and templates if I really want to.
But here are several more benefits of a digital bullet journal, specifically a freeform one (without templates and pre-determined sequencing of pages).
Digital bullet journal supplies you need
Necessary:
iPad: I recommend the iPad mini or iPad Air for this. You certainly can use an iPad Pro, but you really don’t need the mega power behind that piece of machinery. Yes, you’ll experience less drawing lag, but I have both the Mini and the Pro and I prefer bullet journaling on the Mini.
Apple Pencil: If you have any of the iPads listed above, definitely get the Generation 2 Apple Pencil. It automatically charges and attaches to the side of your iPad, which if you’ve used the 1st generation Pencil, you’ll know how much of a game-changer this is. Plus double-tap to change your tool 🥳
Notability: Honestly, use whatever app you love. But if you’ve been here before, you know I love Notability the most.
Optional:
Paperlike screen protector: This makes the writing experience easier, in my opinion, by adding the right amount of friction. Here’s my review.
Protective case without a cover flap: I recommend one without a cover flap so you can access your digital bullet journal without having the extra friction of opening and closing a cover. Sure, you can just use a folio cover (I loooove the Apple keyboard folio for the bigger iPads) and just keep it open, but I’ve found that this clear cover is perfectly minimal for my use case.
And a random—but seemingly important related note—since I started writing this post I decided to go case-free because I am trying to de-plasticize my house to reduce my exposure to metabolism-disrupting chemicals. I plan on sewing a felt slip-cover case soon. But if you’re not plastic-averse, the case above was a great option.
I digress.
13 Reasons to start a freeform digital bullet journal
Starting a digital bullet journal is easy
In Notability, which is now a free iPad app, all you have to do is start a new note and get to it.
Following the traditional bullet journal method created by Ryder Carroll, you write a list of tasks, events, and notes down the page. Simple as that.

The experience is no different in Notability.
You get to make your digital bullet journal your own
Hey—newsflash. It doesn’t have to look beautiful.
Your digital bullet journal is your own, even if you have bad handwriting or can’t draw to save your life. Though I have a few tips below on how to improve the appearance of your handwriting in Notability on the iPad.
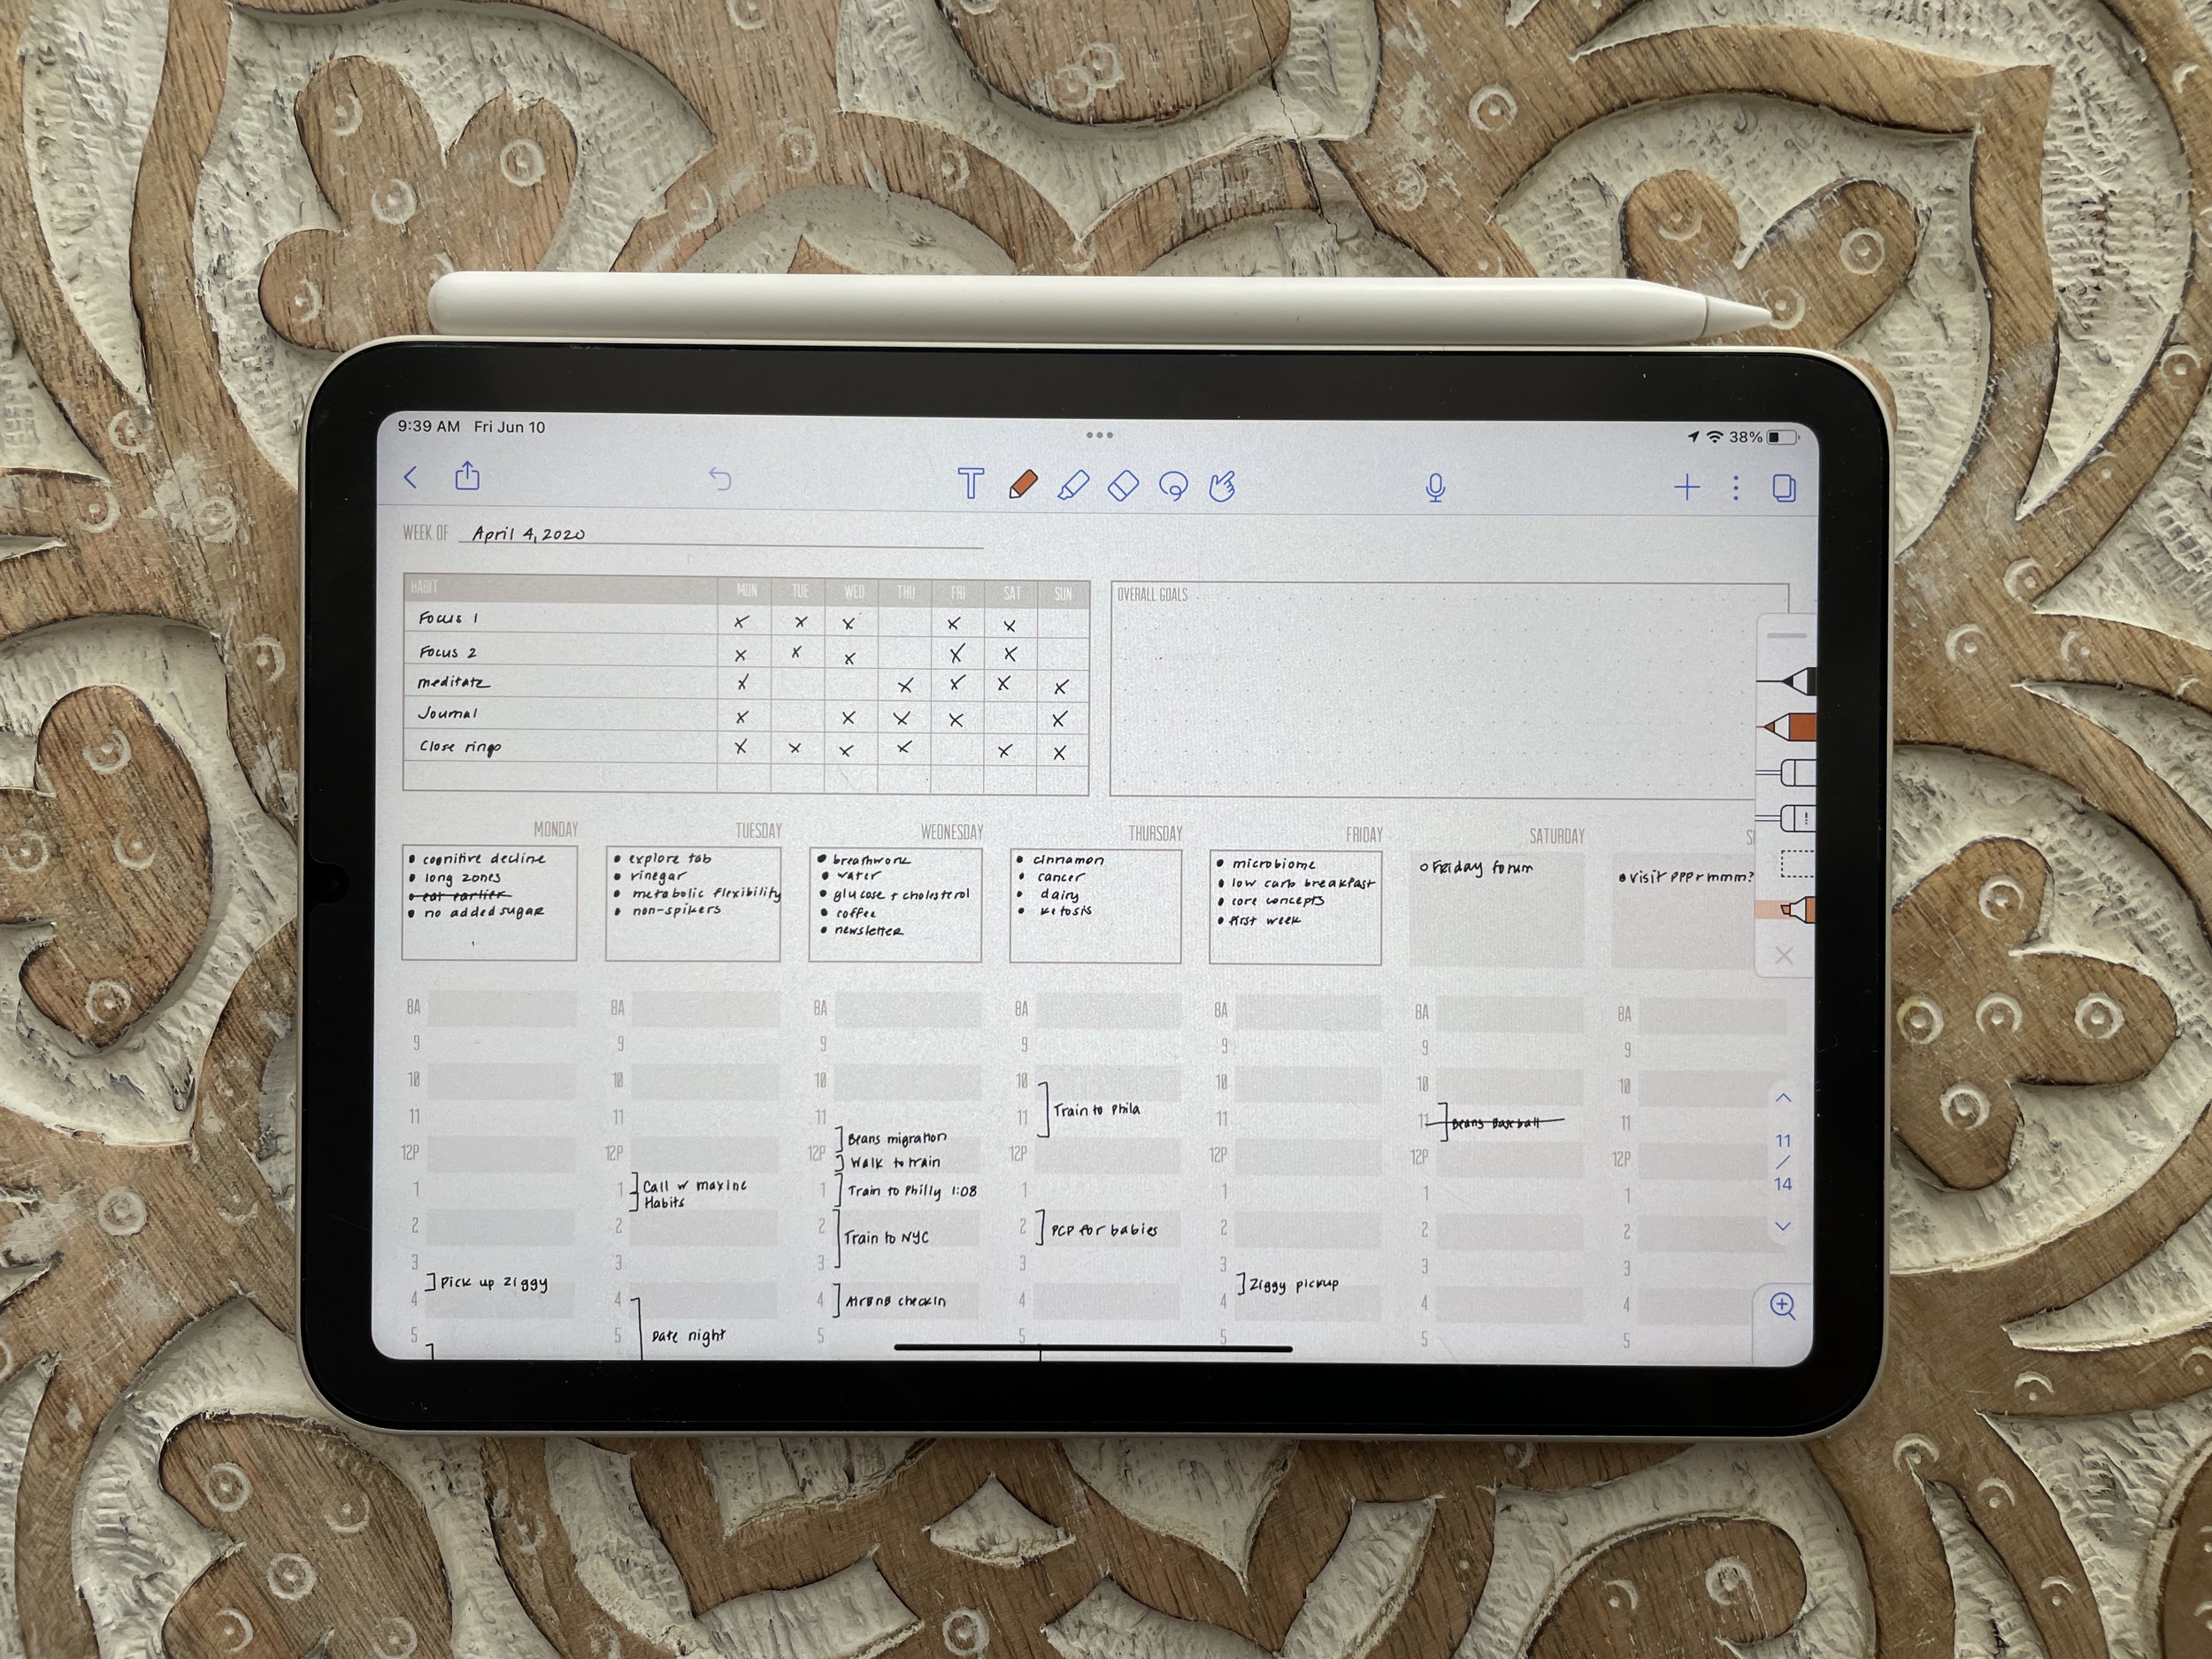
Want to use templates like the one below? Great.
Want to go freeform? Fun.
Want to switch between the two because you change your mind? Even better.
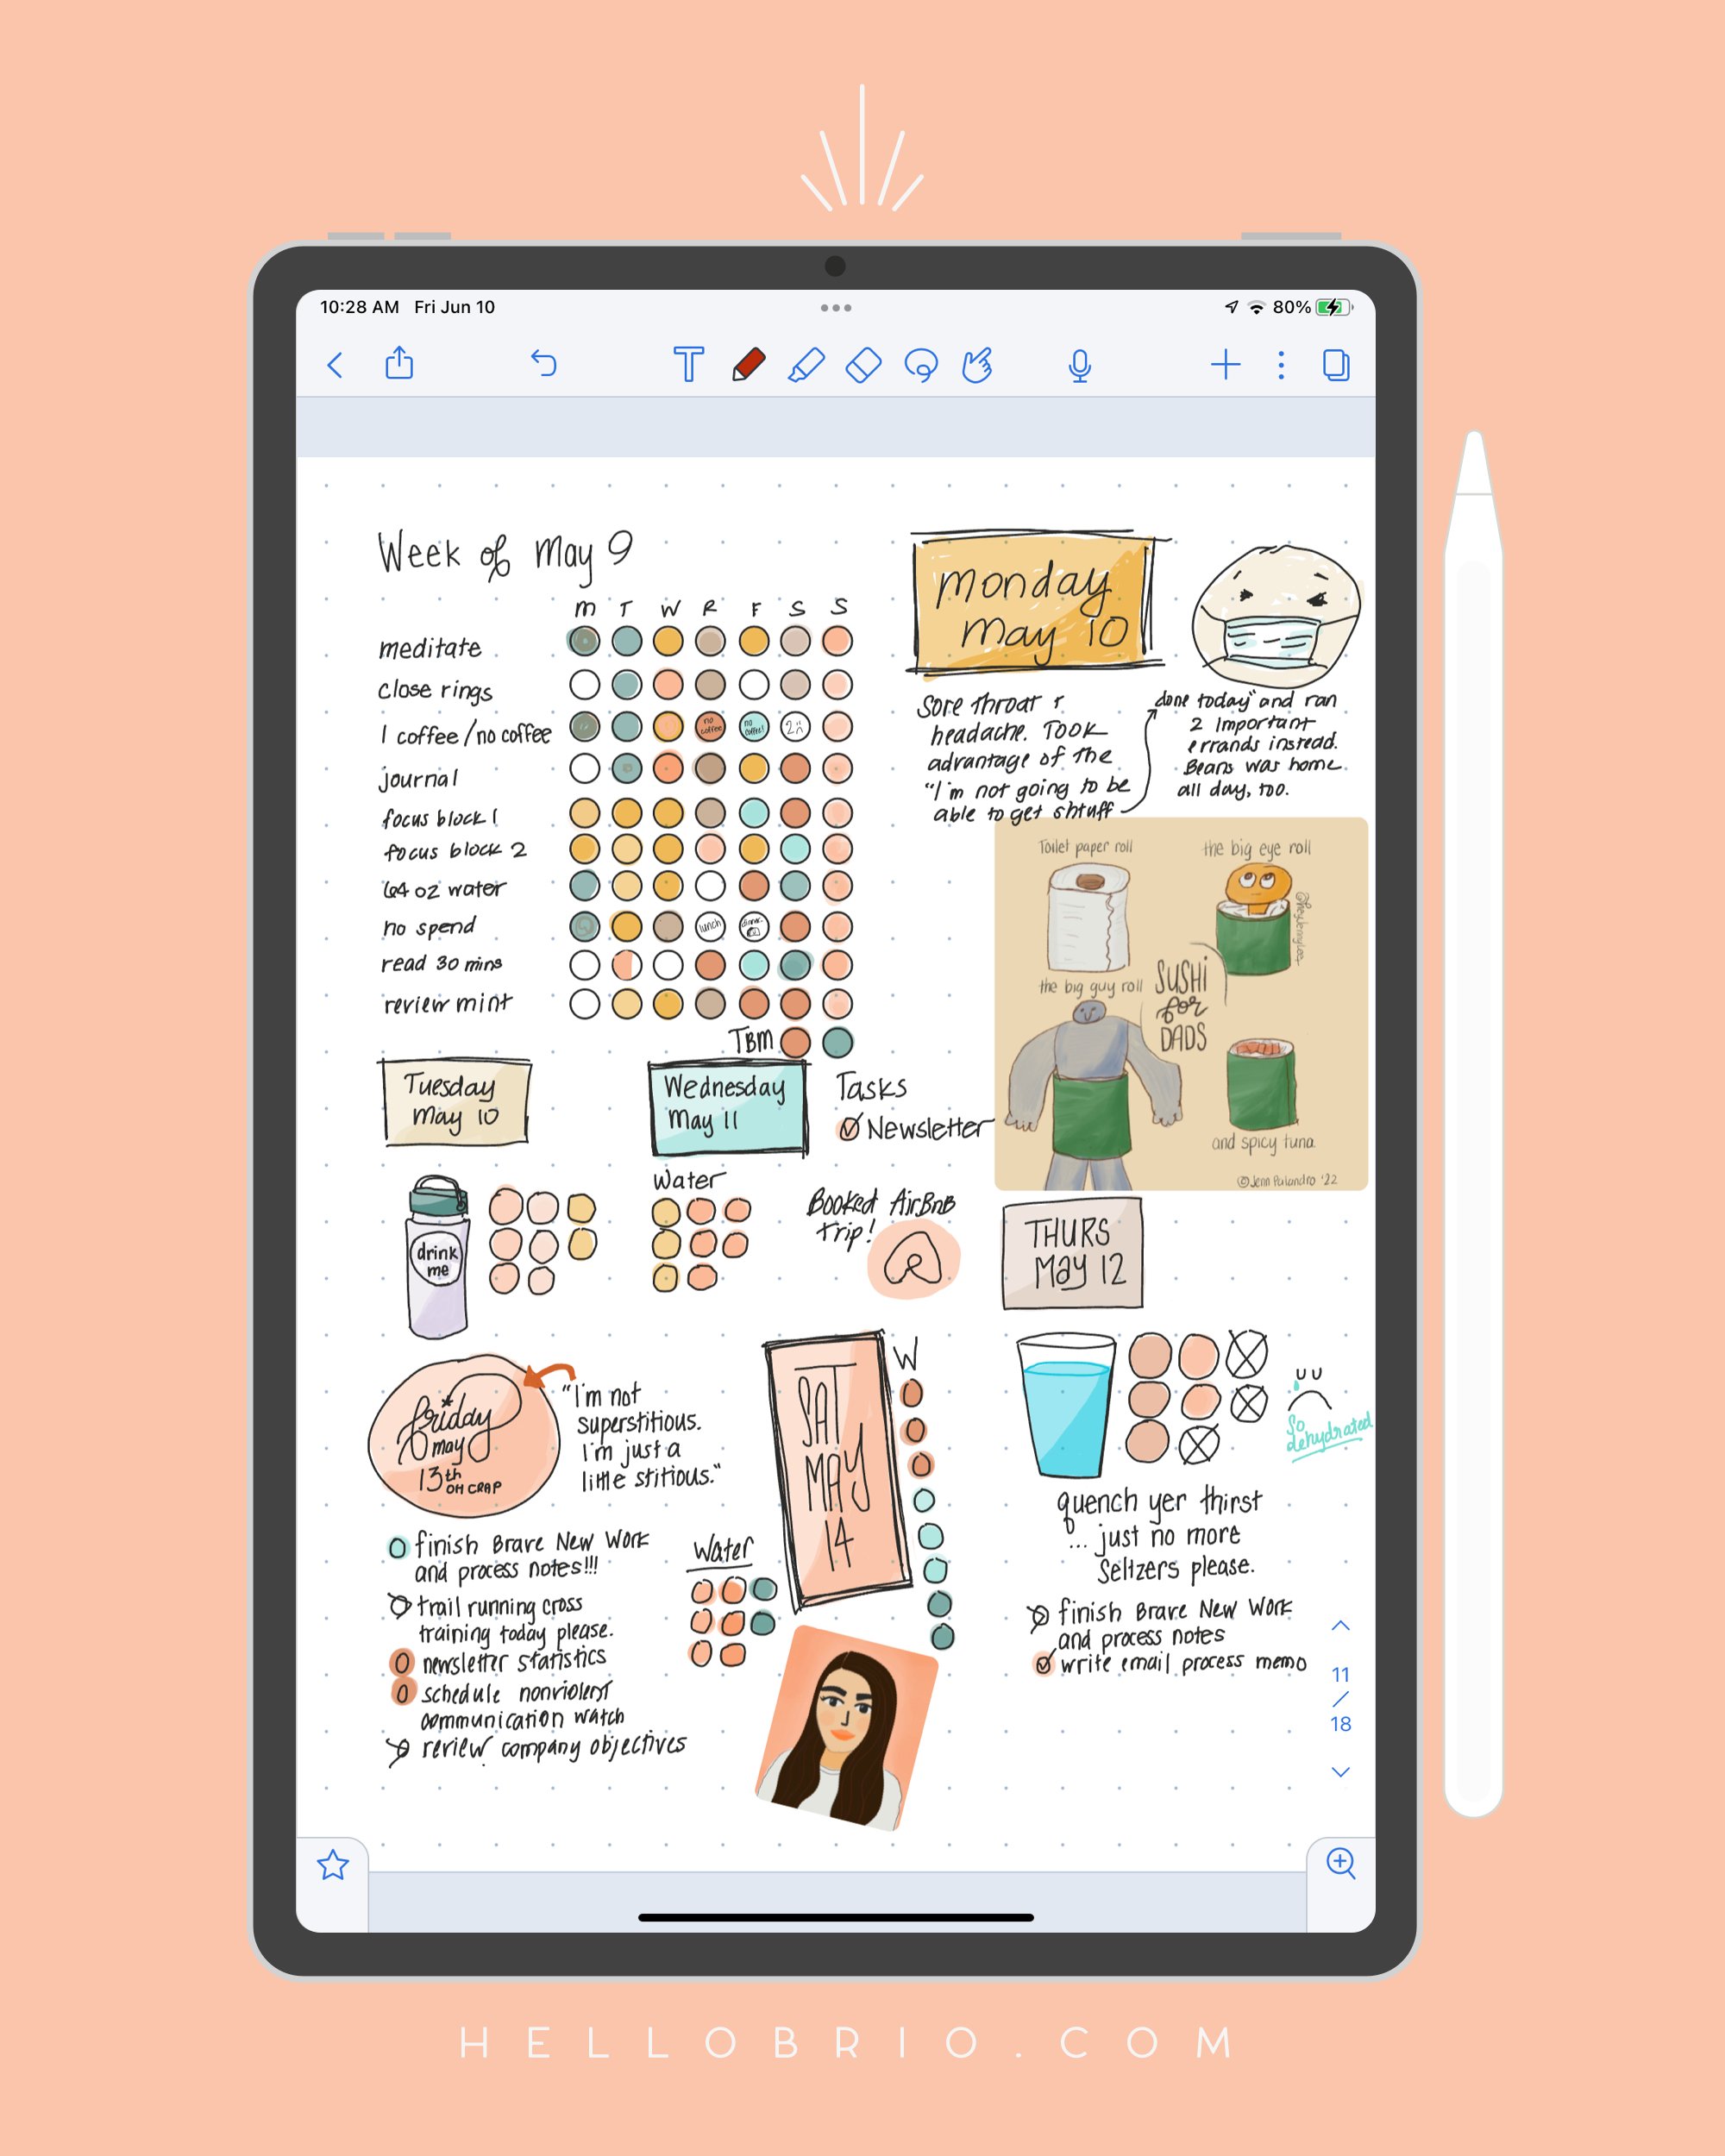
Freeform inspires more creativity
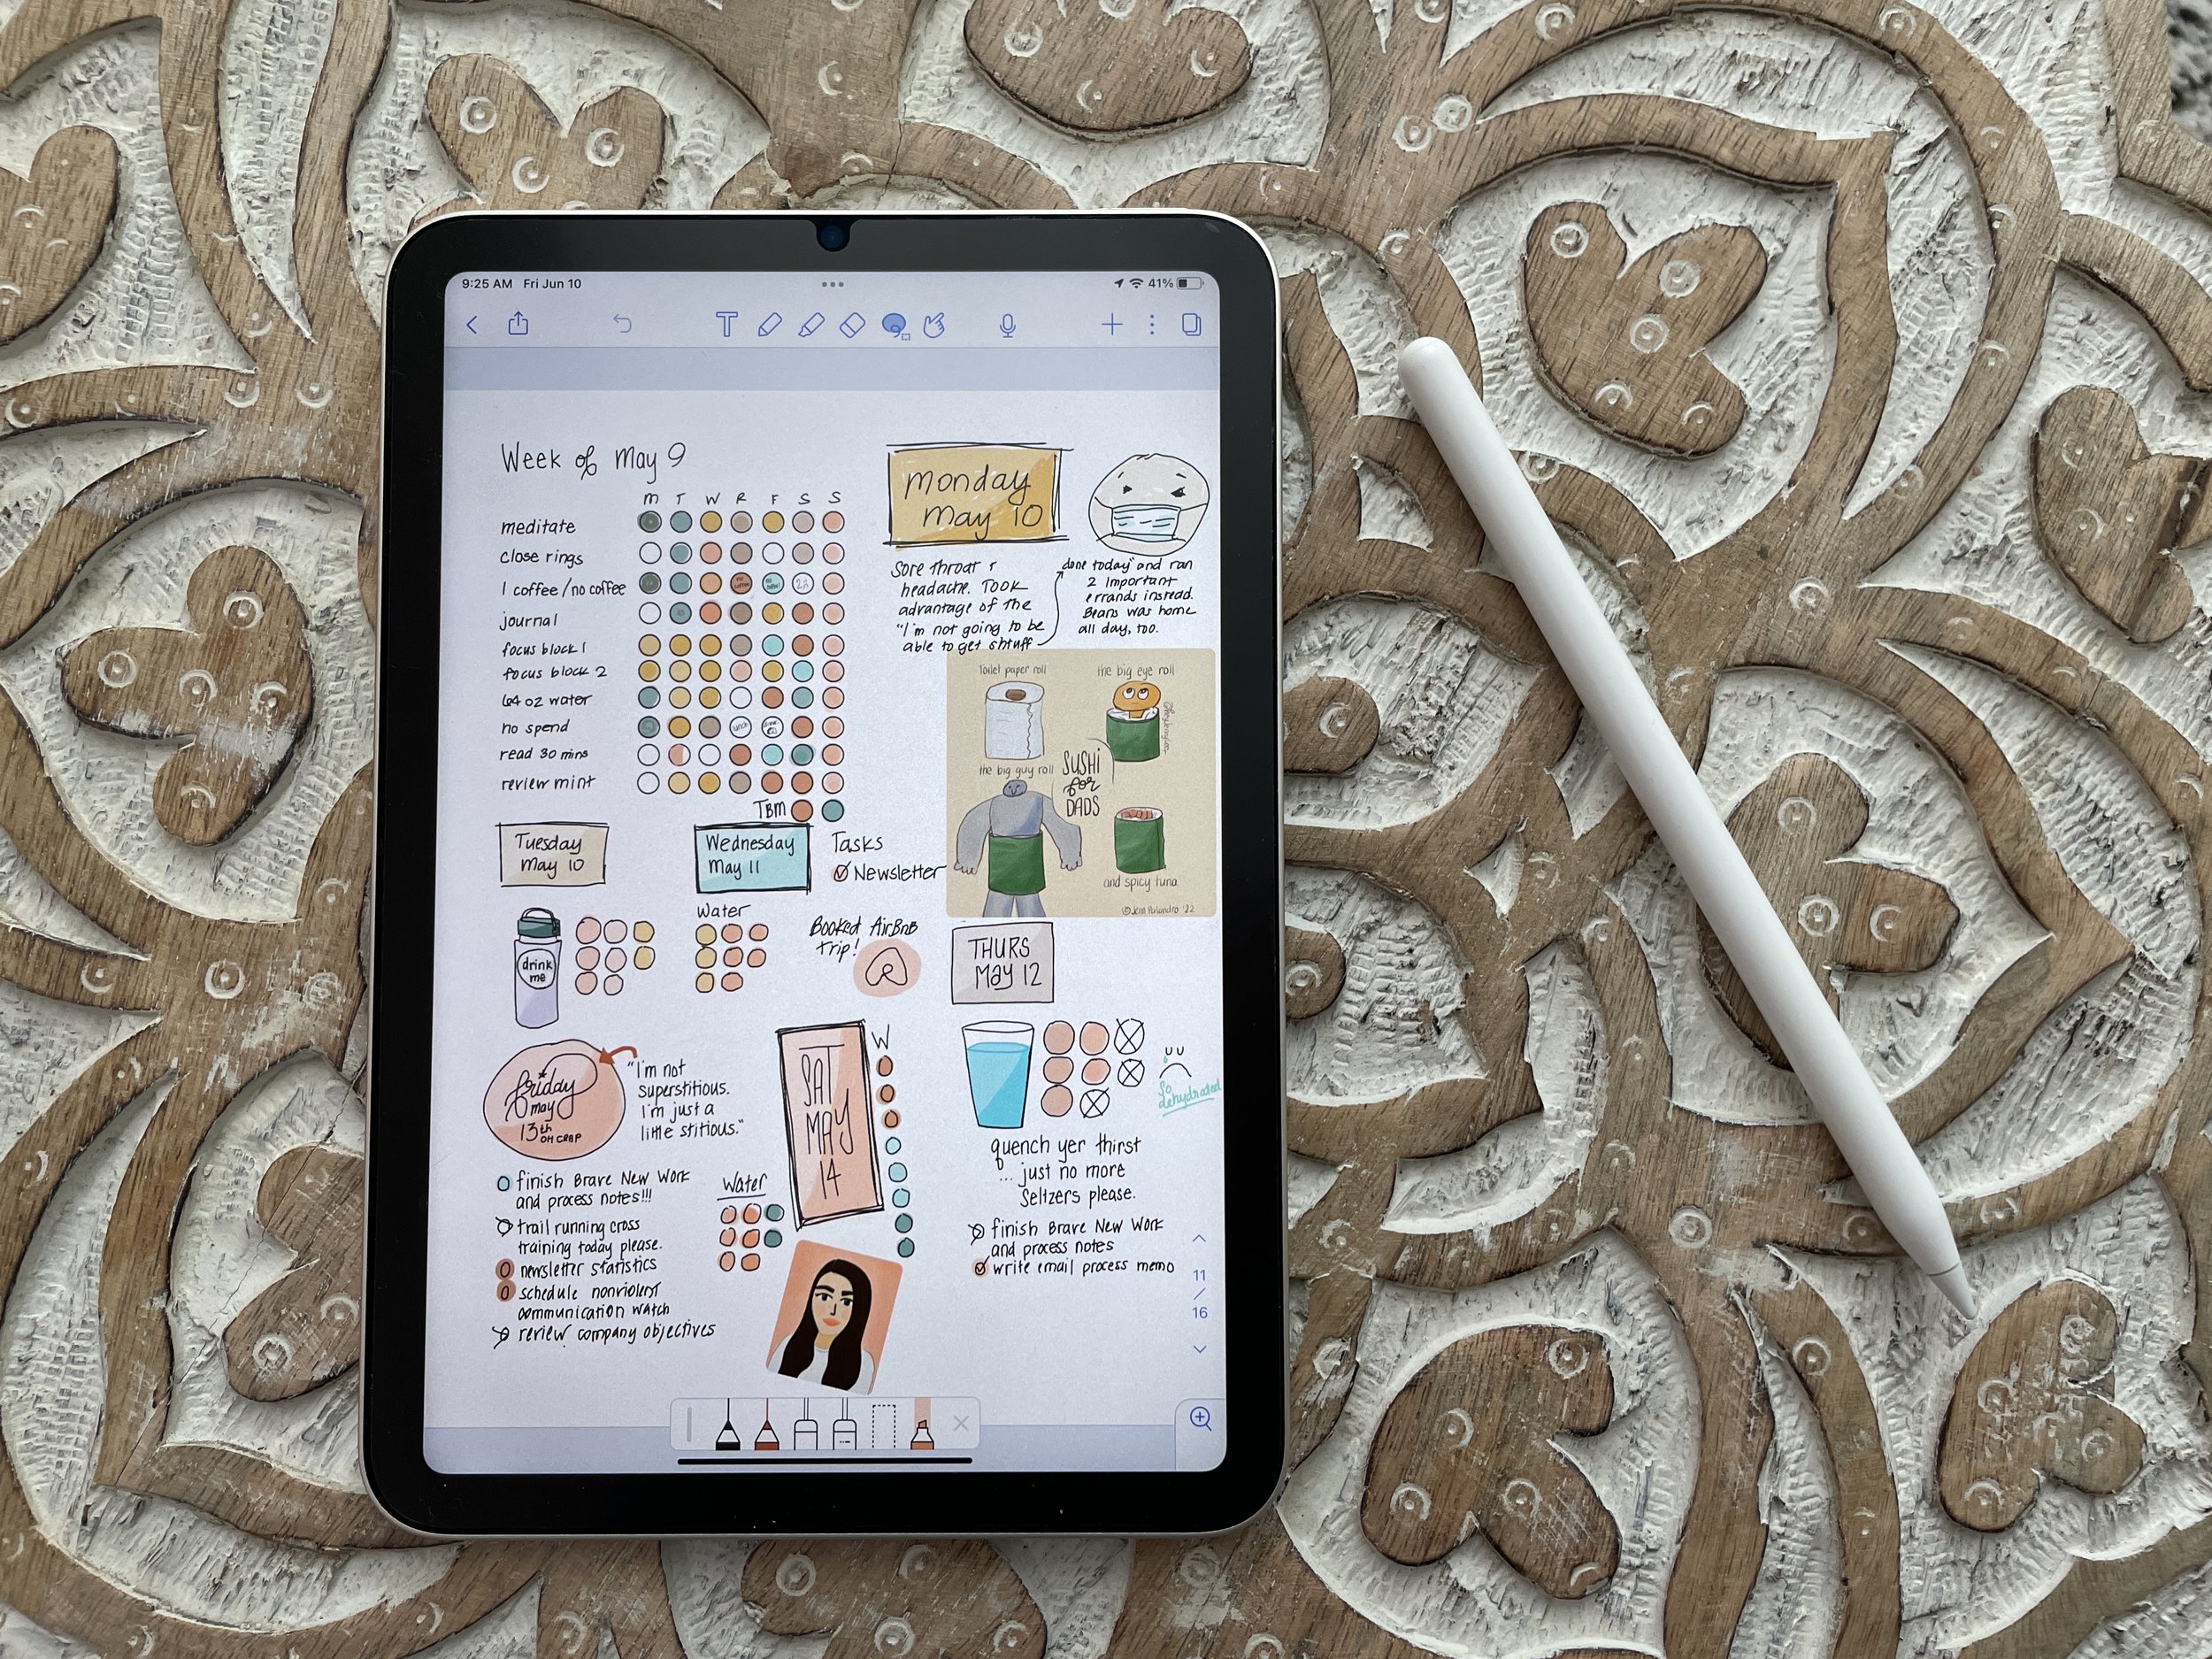
I’m a little biased, because I totally fell in love with the freeform digital bullet journal, calling it “art journaling.”
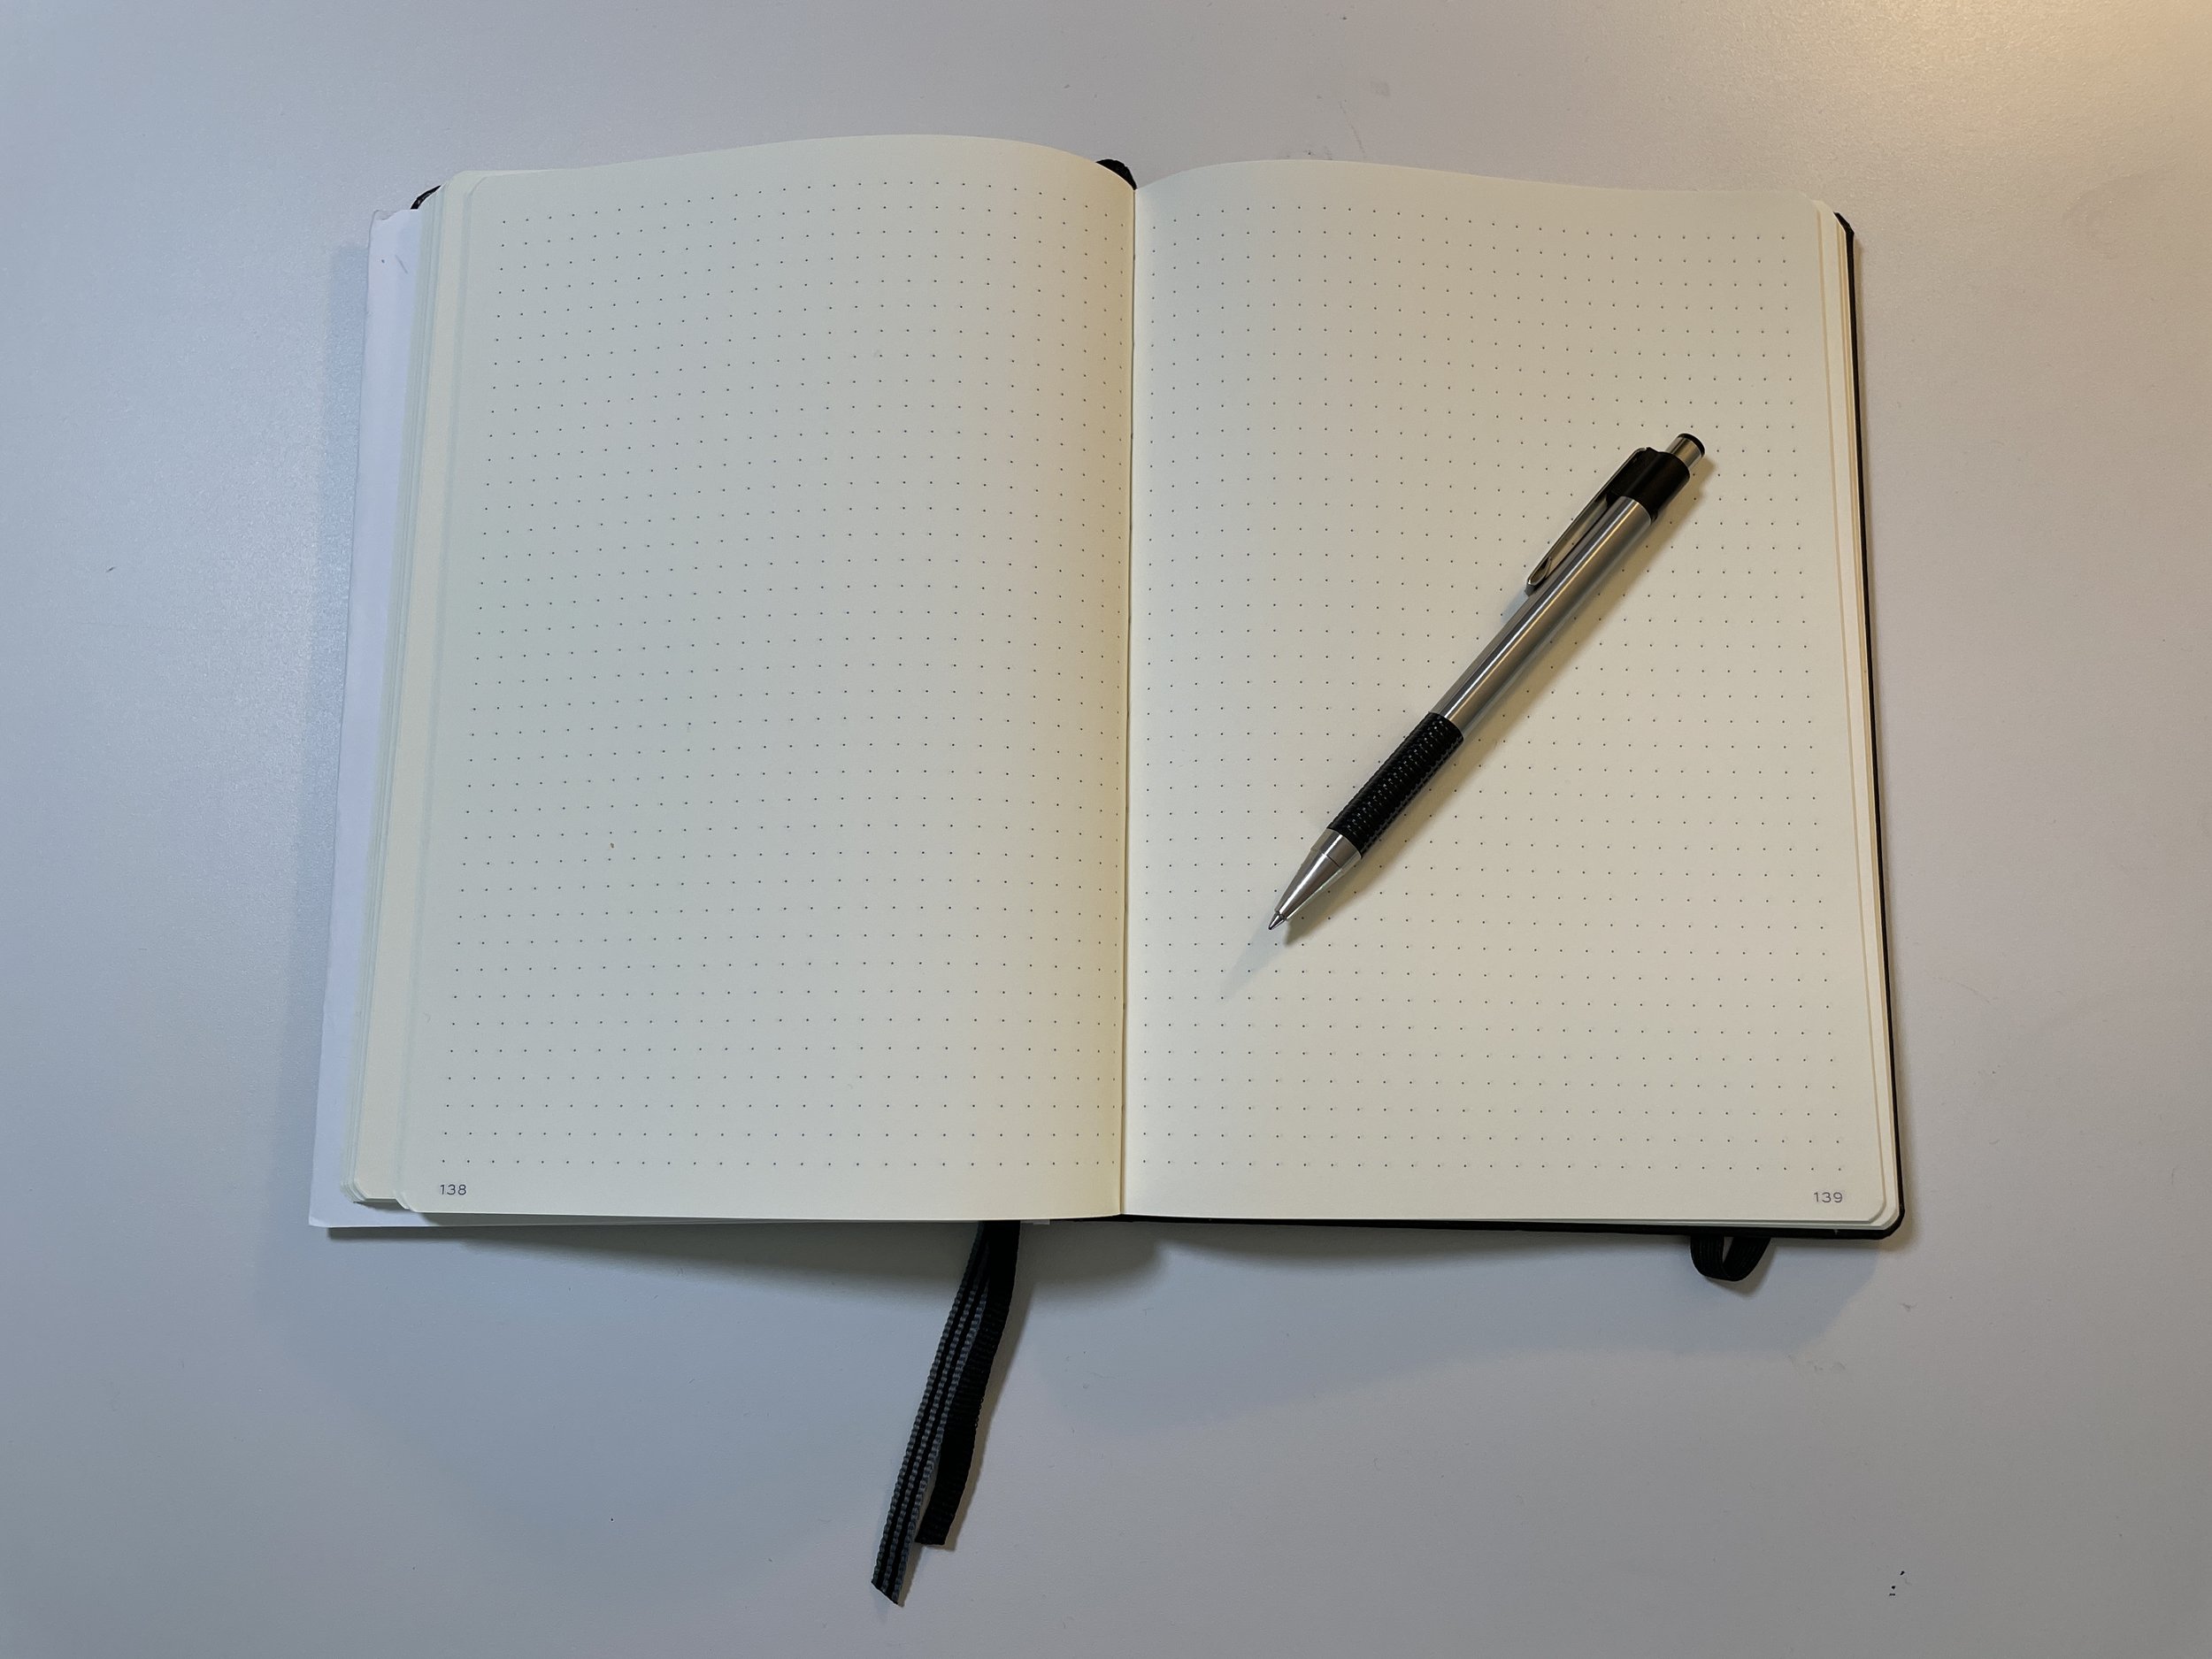
My goal of starting my art journal was to get out of a creativity rut and draw more with low stakes. Though, in my favorite Leuchhturm dotted journal, because I can’t get enough of those buttery pages. (And for some reason the Amazon colored pencils with Leuchhturm? A beautiful combination.)
As my art journal evolved, it helped me realize that the lack of pressure to draw perfectly straight lines and perfectly square boxes felt liberating.
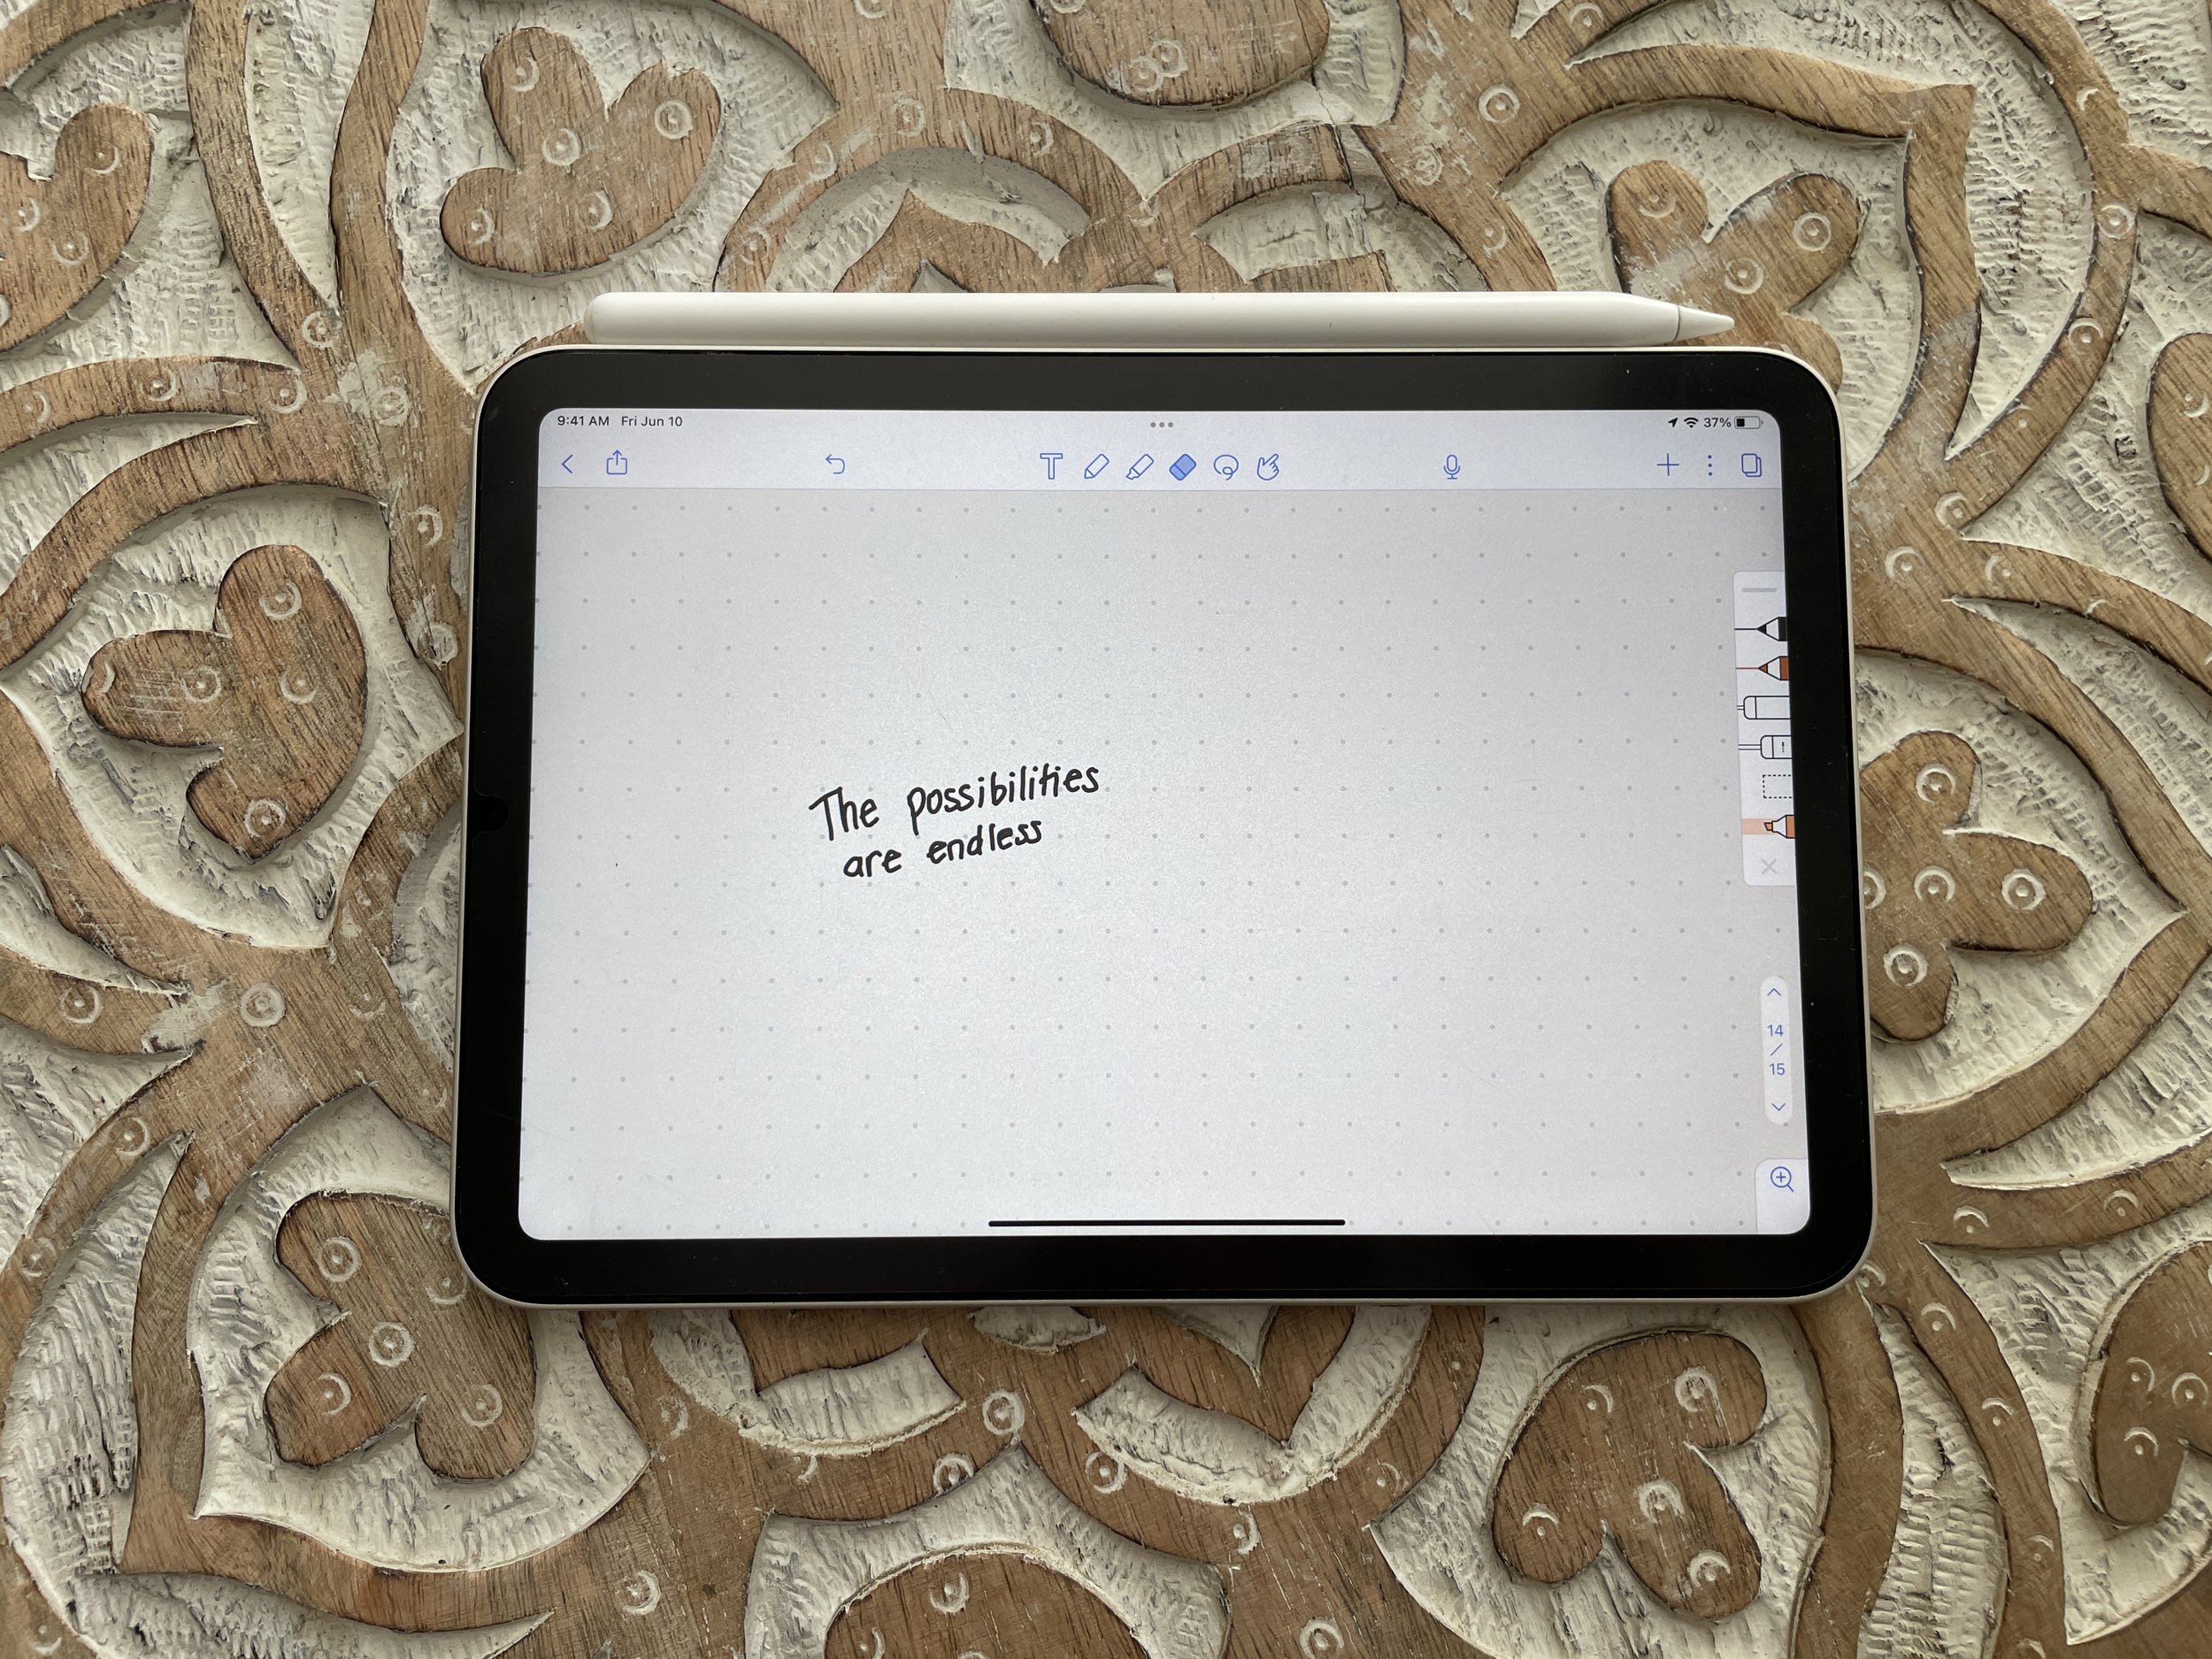
It’s endless
Y’know that feeling when you’re bullet journaling… and then you run out of room?
The old one goes on your shelf. You reach for it from time to time for reference, but it pretty much just collects dust. With a digital bullet journal, you can create a new “note” anytime you want a different chapter in your life. Want one separate note for each year? Quarter? Month? It’s up to you.
But, because the digital bullet journal is… digital… you can just keep going in one note if you so choose.
You have a synced version of it with you wherever you go
Ah, the cloud.
Notability works on Mac, iPad, and iPhone. While a digital bullet journal may be difficult to interact with on the iPhone, making it mostly read-only, it’s still nice to have the ability to reference it whenever you need to. Because let’s face it, when are you ever without your phone?
Plus, your bullet journal views will always be up to date, as long as you have reliable internet service.
It’s searchable
Remember that time you wrote down an important fact about grass-fed beef and then you needed to find it again?
With analog bullet journals, you’d have to dig through your archive, trying to pin the moment to a specific time in your life, relying on your brain to remember when-ish you wrote that down based on other foggy contextual clues.
Digital bullet journal in Notability? Search. Yes—it searches your handwriting!
Digital bullet journals are portable
I got so. tired. so. fast. of carrying around my paper bullet journal and my accompanying pencil case even though it was super cute.


Once I remembered how much better it is to not lug around supplies, especially with young kids in tow, I made the switch back to digital bullet journaling on the iPad. (When given the choice of carrying diapers versus your pencil case… you choose the diapers.)
The iPad (especially the new Mini) is so much easier than all of this:

You save money on planners (and save planet earth, woo!)
I know this benefit is flimsy because a new iPad Mini + 2nd Generation Pencil + case will end up costing you $635, but let’s consider the alternative scenario for a second.
Say you find a really awesome paper planner. Based on the description or what you can sneak a peek of at the store, it seems like it’ll work really well for you. But then you get it, lose it, spill coffee on it, or lose interest… and it sits on your desk until you throw it out, or you hoard it in some box until you rediscover it 20 years later, wondering why you ever bought it in the first place. OR—you have to buy a new planner every year.
A digital planner and digital bullet journal are just there. And with a Digital Doodle Diary, you just swipe to go to a new page and create whatever suits you at the moment. (Inspiration from Pinterest is free, yo.)
You save time by not drawing templates
Forget drawing pixel-perfect templates for each new page.
With a Digital Doodle Diary especially, the freeform aspect of it allows you to save time drawing or hunting for the next best PDF template to buy and import. And Notability just made it really easy for you to create your own templates once and use them again and again. Win-win-win.
One of the things I hated most about a regular bullet journal was busting out the ruler and counting squares. I tried to find the zen joy in it… the slow life benefit… but it frustrated me to no end. Plus my wite-out dispenser got a really good workout.
Going completely template-free feels so good for my soul.
Unlimited tools
I love stationery and pen shopping just as much as the next person.
But having all of these in one location is mind-blowing:
Any color under the hexadecimal rainbow at my disposal, in both pen and highlighter form. And in any thickness you desire.
The select tool allows you to move stuff wherever you want.
The pixel versus object eraser helps for quick fixes versus obsessively neat neurotic fixes.
(Notability, if you’re listening… I’d super love a pencil tool. Can’t beat that yummy gritty pencil texture.)
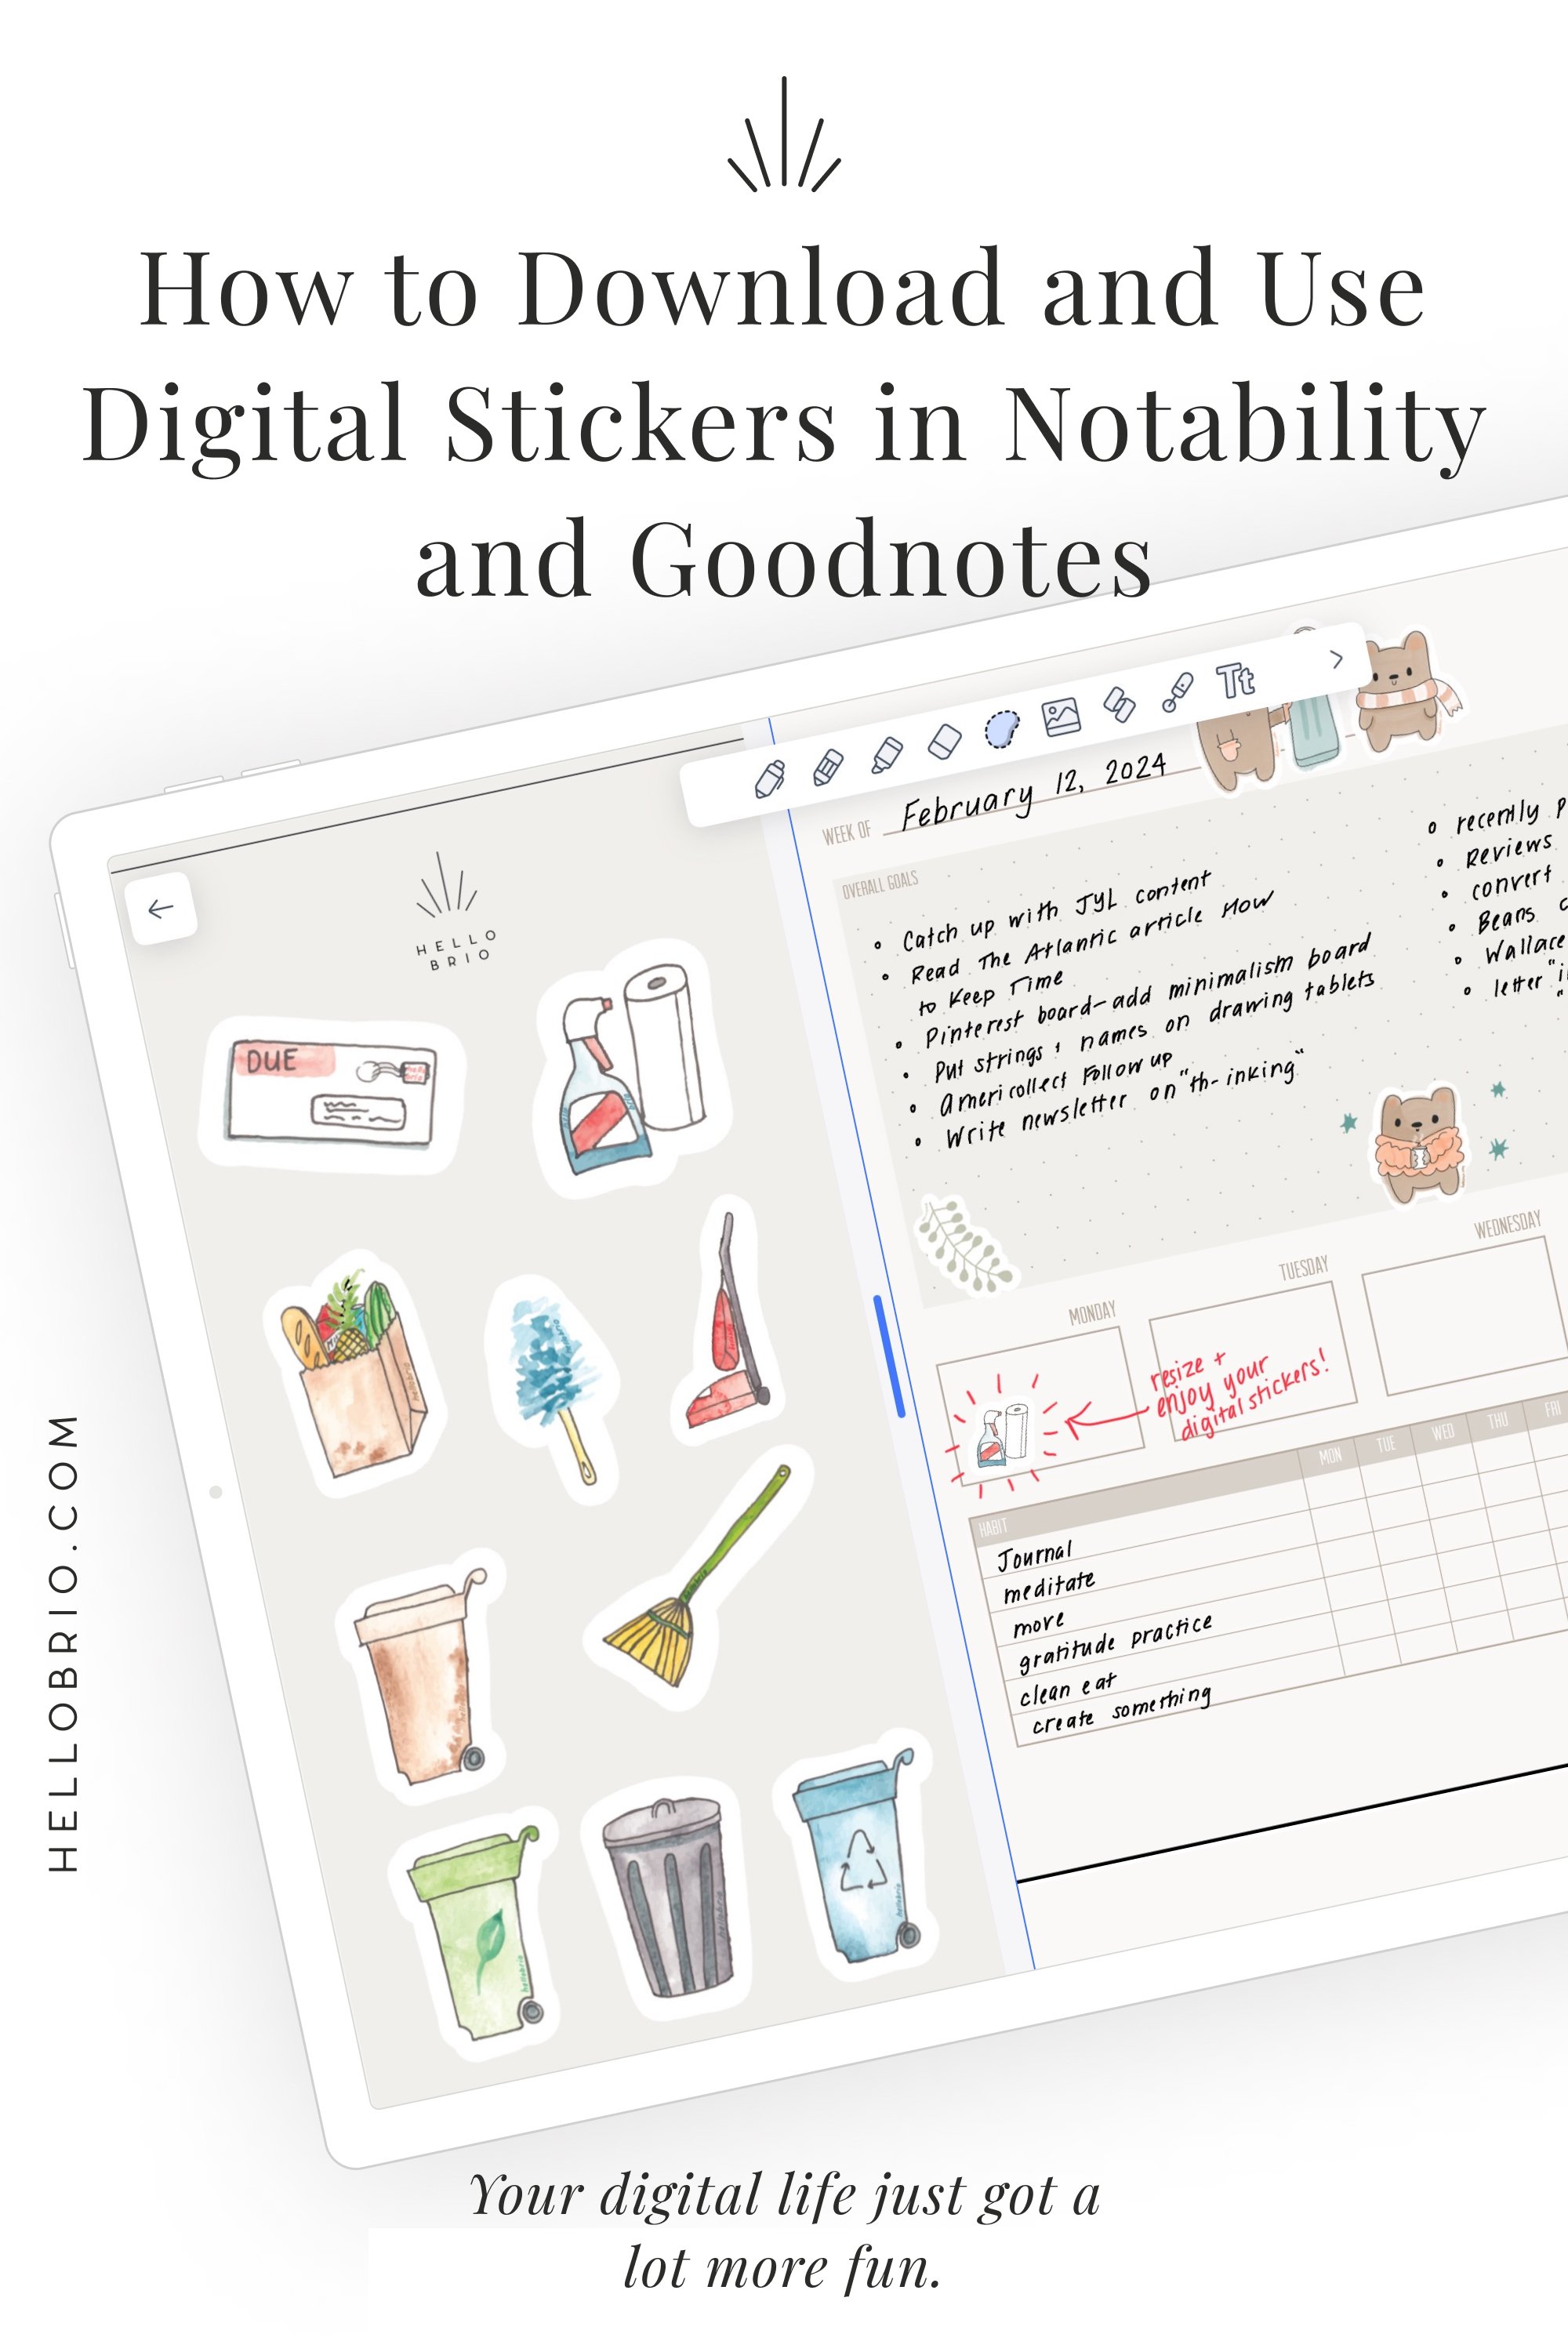
Digital stickers.
SO MANY STICKERS.
You can create your own (I can do a post on this later if you want) or you can buy digital stickers or digital washi tape. Or even mini templates that will be super helpful for water tracking or anything else you use on a regular basis.

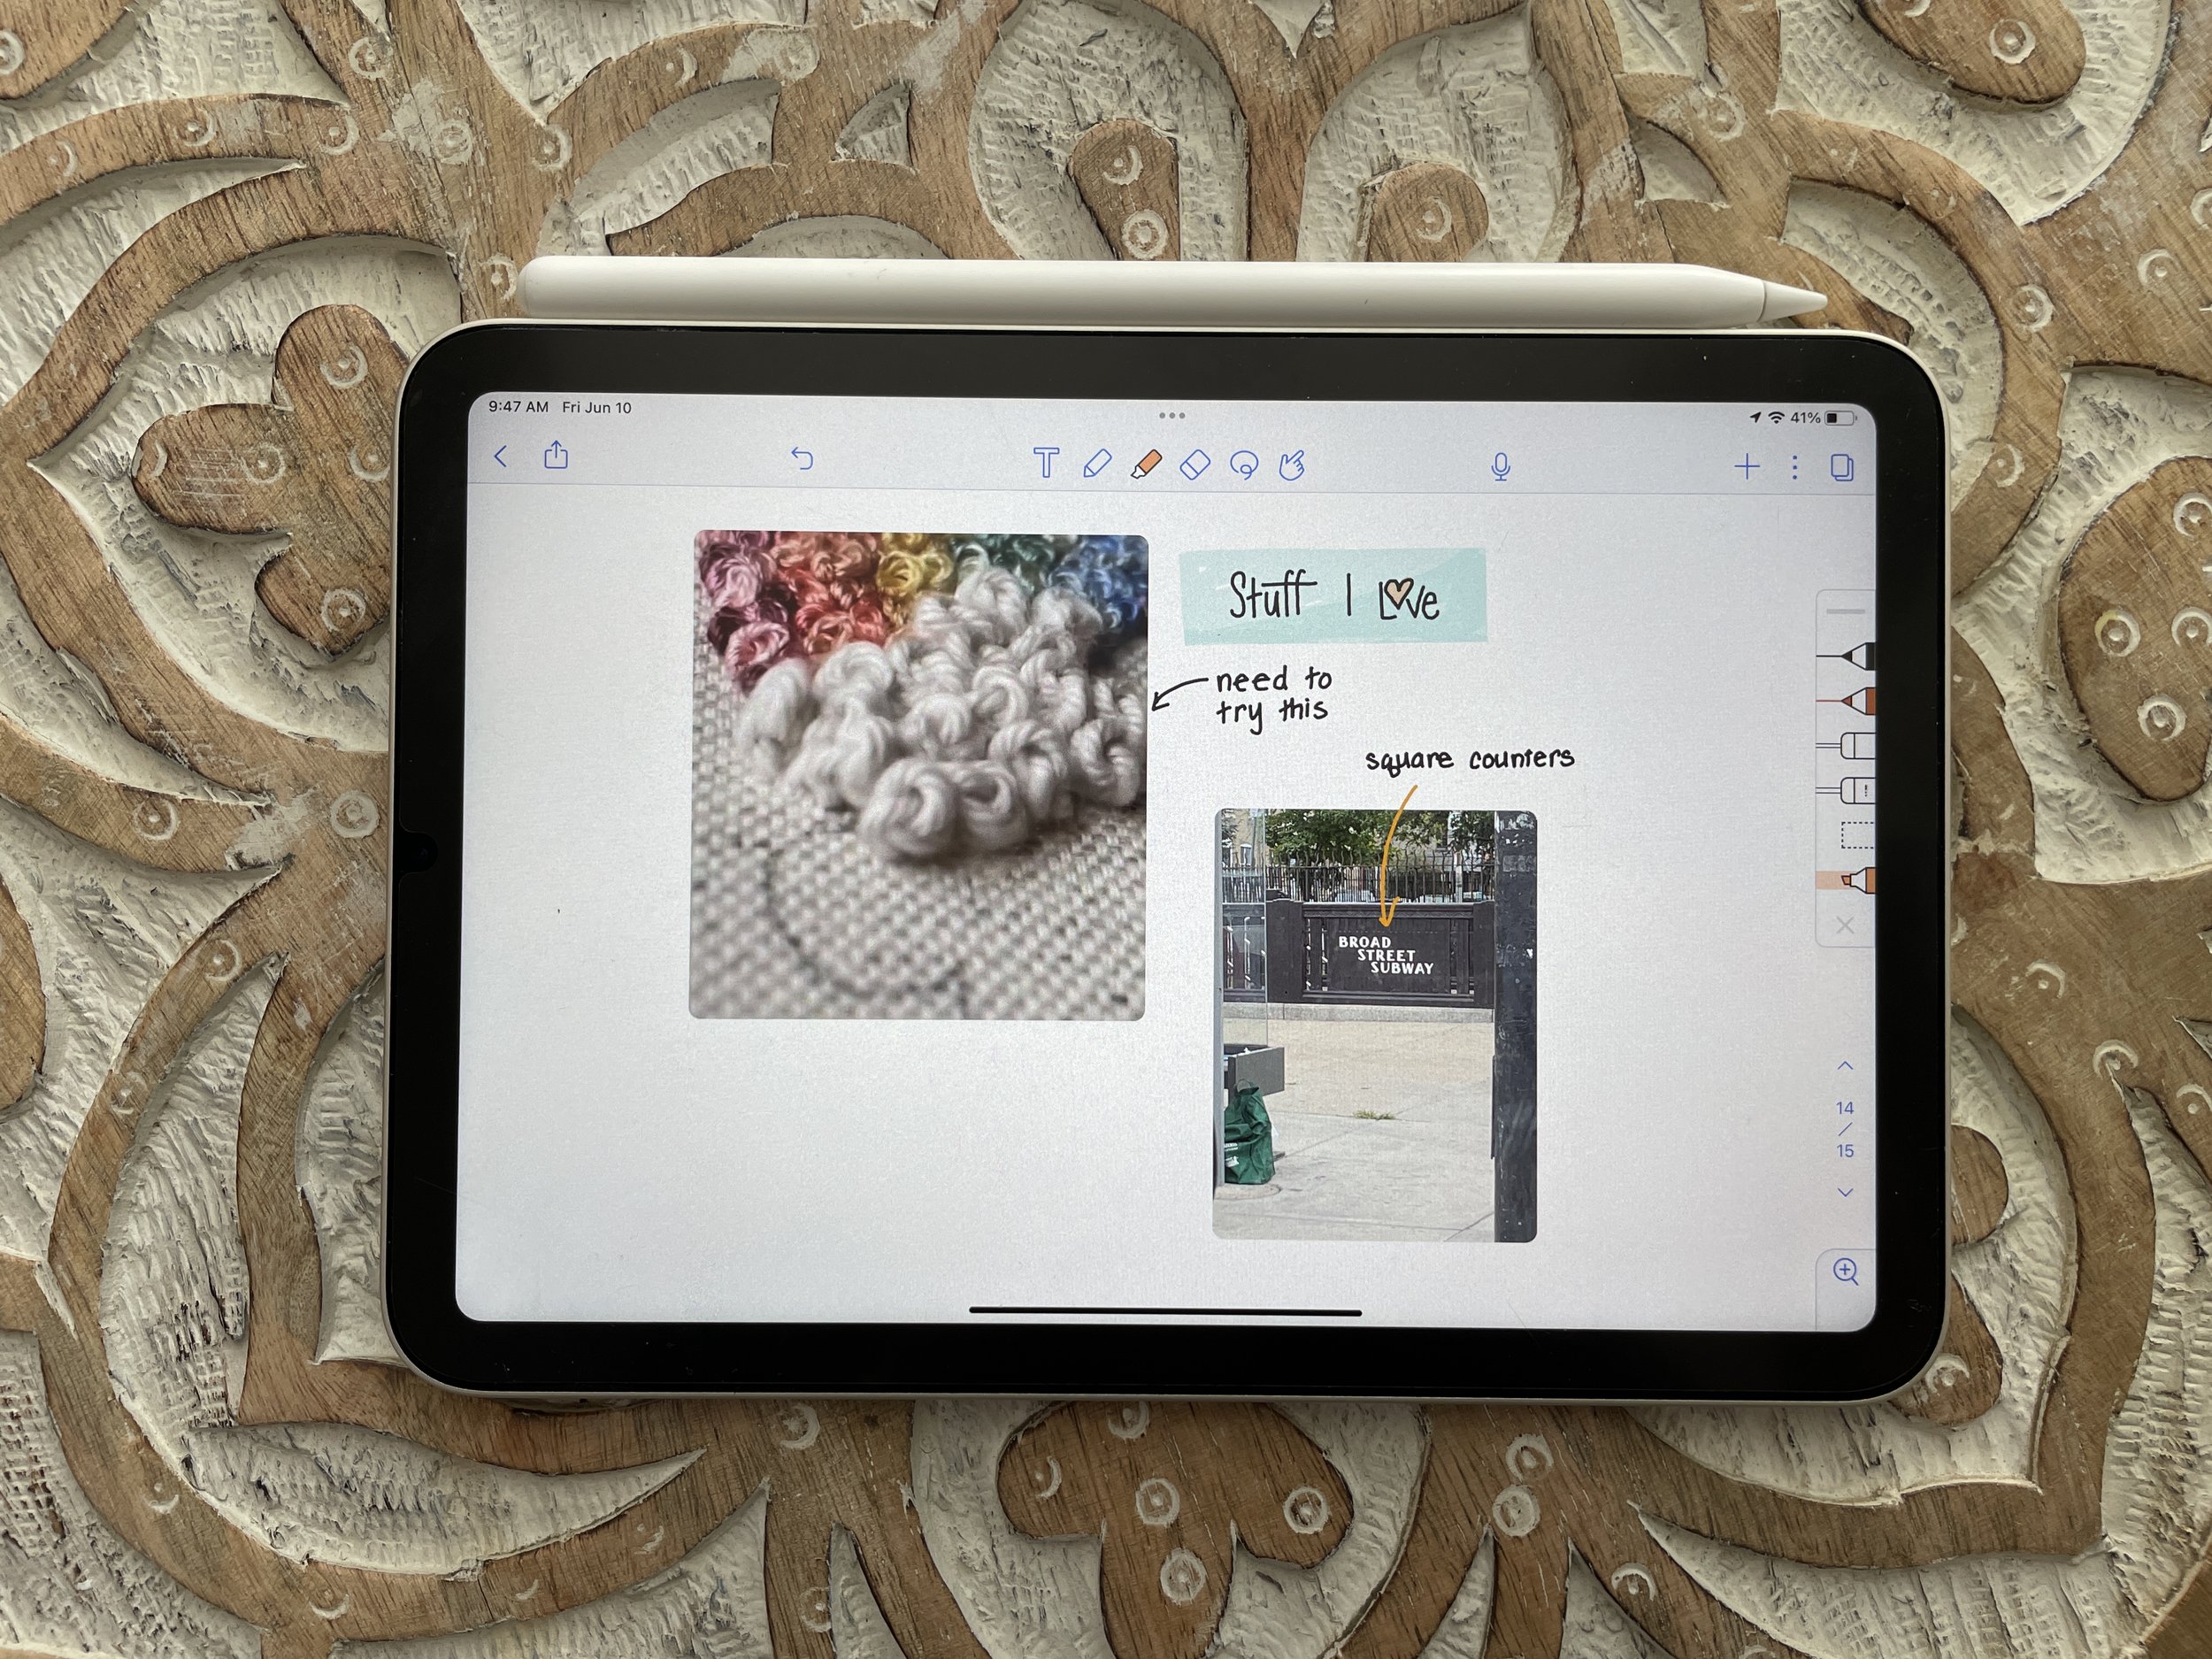
Photos!
How cool is it to be able to plop a cute pic of your kids or pup in there as a nice way of adding a nice memory into your Digital Doodle Diary? Or like, create a mood board with images you yank from Pinterest? Add any image and just re-size it and re-position it to your liking.
Yeah yeah, you can technically do this with physical photos in an analog journal. But the thought of:
Ordering photos on your phone
Putting on real pants
Driving all the way to your local Walgreens to pick up your order
Searching for glue
Finally finding it, realizing your dried-out glue stick won’t be of any help
And then also realizing the photo size you ordered takes up the whole gd page?
You get the idea.
Undo
‘Nuff said.
Phew. Onto the Notability tutorial to get started with your very own Digital Doodle Diary.
(FINALLY. Geez, Jenn.)
The basics of Notability for your freeform digital bullet journal: pens, highlighters, erasers, lasso tools, navigation, and more
Starting a journal
Once you download Notability, select the blue button at the bottom-right of the screen to start a new note.

From there, the world is your oyster.
If you want to get more granular with your settings, let’s dive into a couple of things here:
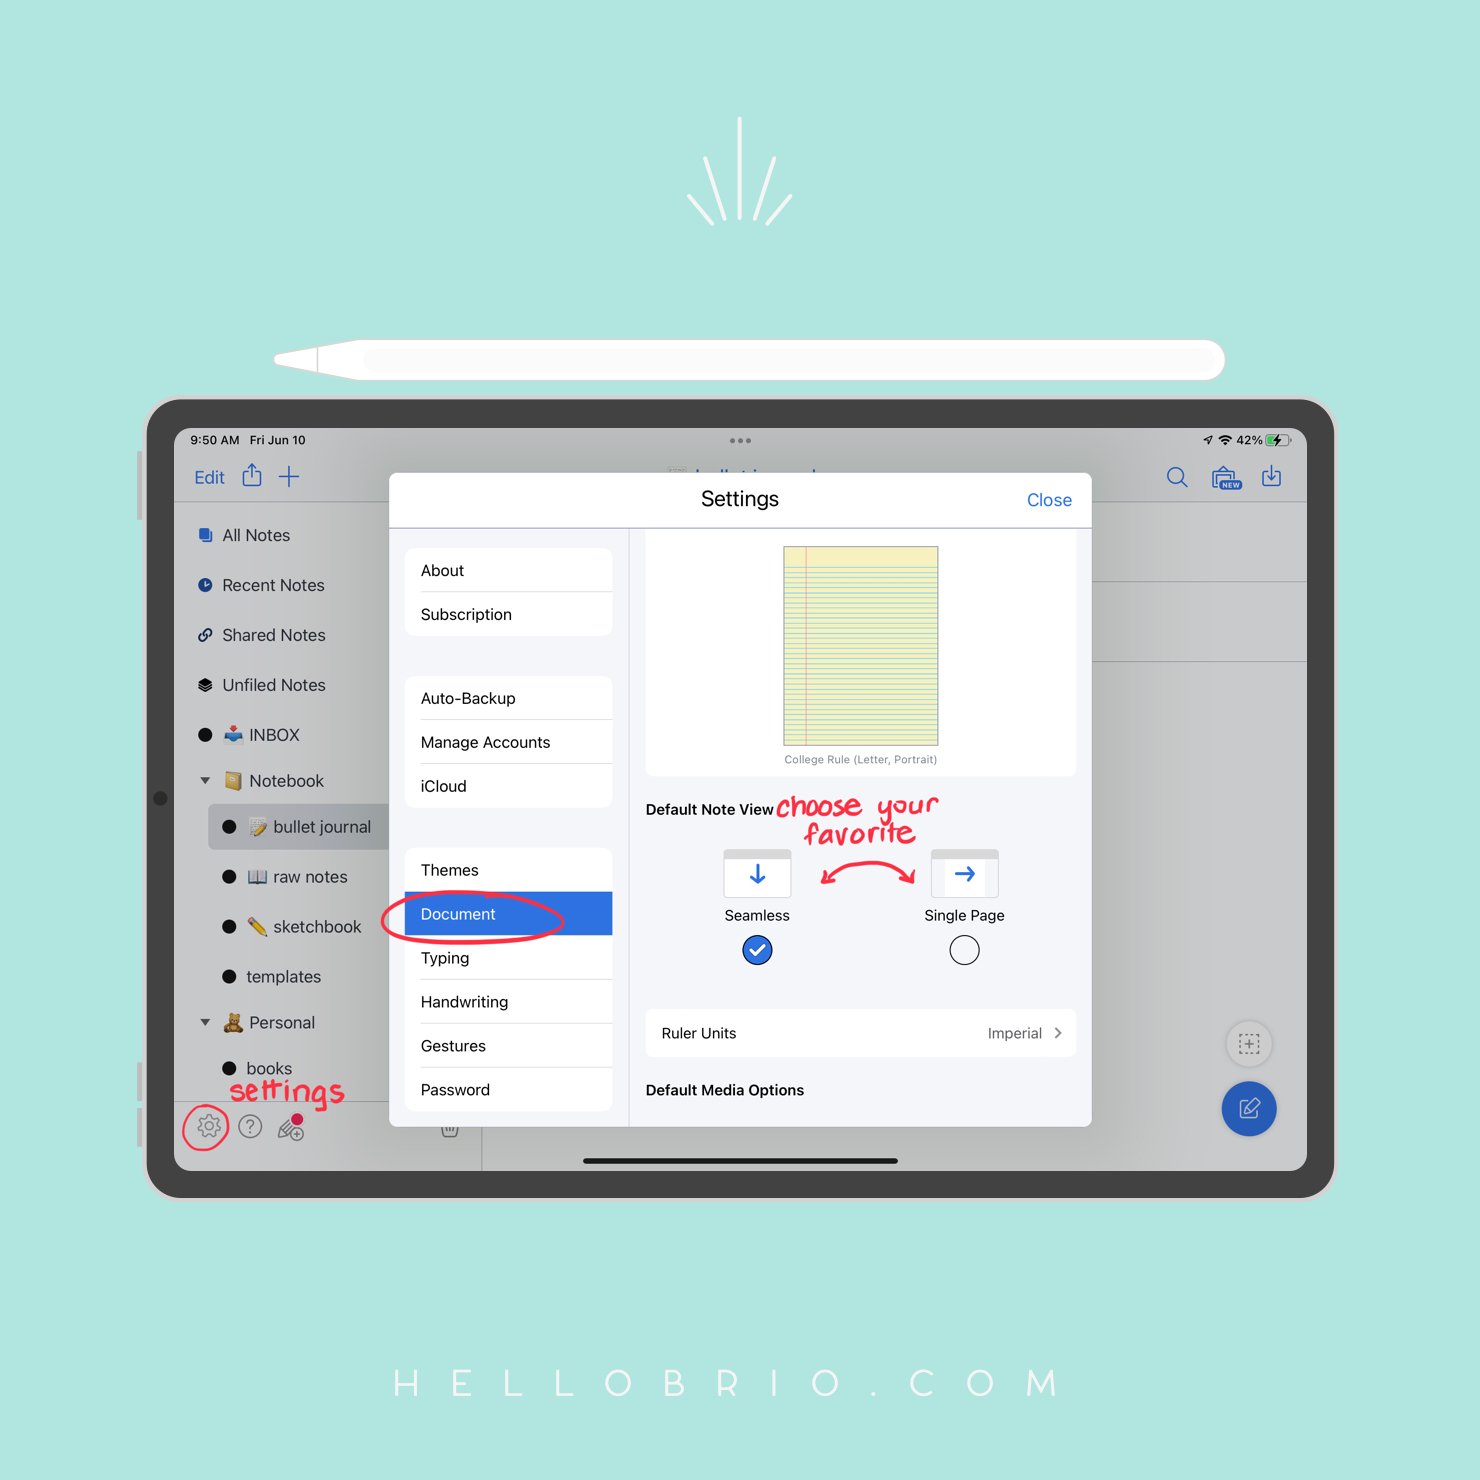
To toggle page-swiping versus continuous scroll
Go back to the main menu
Select Settings then Document
Choose Seamless for continuous scroll or Single Page for page-flipping.
The setting is up to you; some choose Single Page for a more realistic vibe.
Set up Auto-Backup
It quells my anxiety to have a backup of my journal in the cloud. It’s the digital version of putting “Please return to Jenn Palandro, return reward $25,” except it’s more likely to work.
In settings, go to Auto-Backup, then choose your service and follow the prompts. (I use Google Drive.)
Back up as the Note format so you can access your editable notes again on a new device if anything were to happen to your beloved baby iPad.
Choose your paper background
Back in your note, hit the three-dot icon in the top right, then Templates.
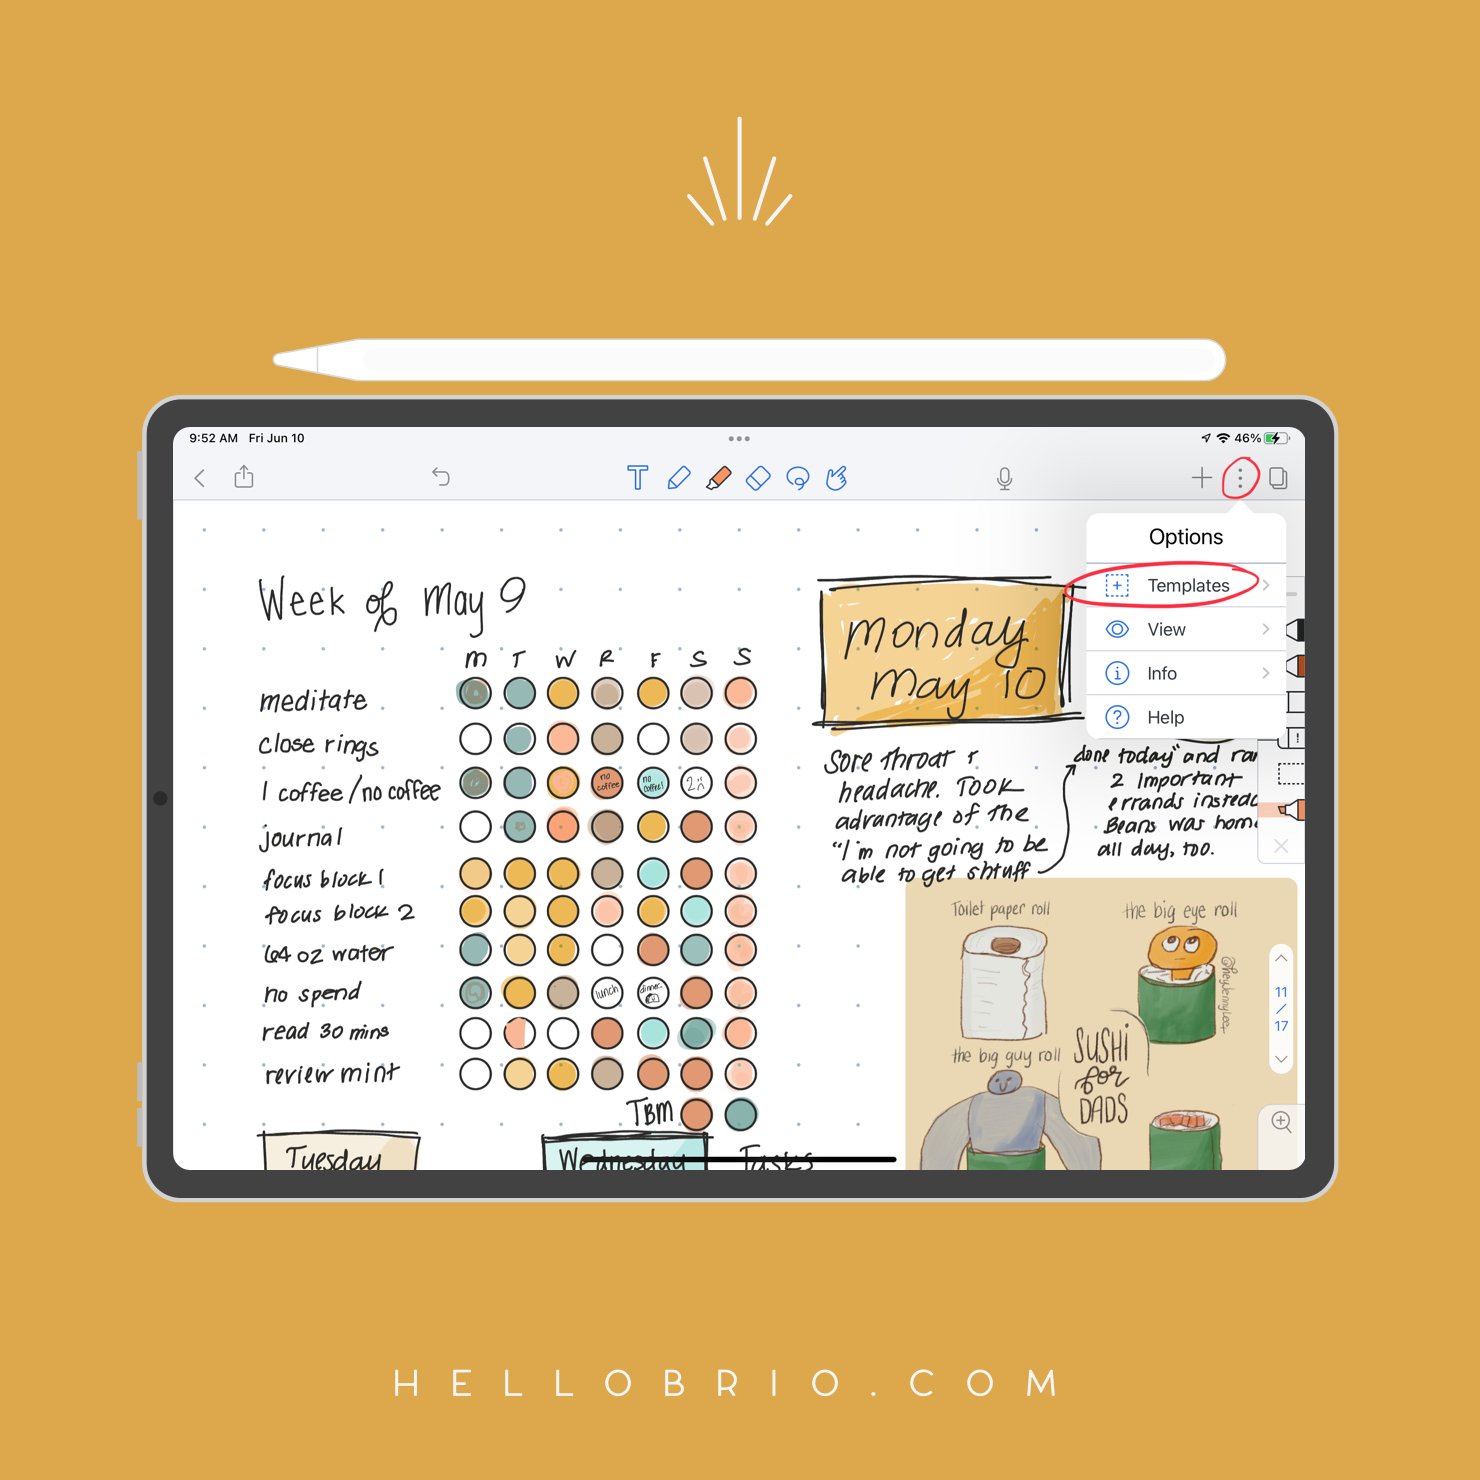
There are so 👏 many 👏 backgrounds to choose from! I use these settings for my Digital Doodle Diary:
Letter
Portrait
Dot-grid, size 4
White

Play around and find what sort of background you love. If you decide you don’t like it after a while, you can just go in there and change it!
(Note: The background will change for the entire note, not just your current page. The only way to get around this, for now, is to use a PDF digital planning template.)
Tools 101: Pens, highlighters, and erasers
PENS. Let’s do this.
At the top of Notability is your menu bar. The tools I use most often for the freeform digital bullet journal are:
Pen: Tap once to select it. Tap it again to bring up your options, which include size, color, and line stroke type.

Highlighter: A more translucent option, which always goes behind your pen and always erases first (I’ll highlight why that’s important later on. Point Jenn for Dad Joke.) Same deal for the options as the pen here: size, color, line stroke type.
Eraser: Beyond the size of your eraser, it also has a Whole setting and a Partial setting. The whole setting is great for quick clean-up, and Partial comes in handy for drawing.
Creating a Favorites pen pack in Notability
Y’know how you have your ✨ entire pen collection ✨ and then your ride-or-die, I-can’t-throw-out-my-back-again set? The Favorites pen bar is the latter.
To add to your favorites bar, select a tool from the ones listed above in Tools 101.
Then, select Favorites to create your custom pen pack. You’ll see it jump to that mini bar, which you can move around by tapping on the grey bar.

Remove pens from the Favorites bar by selecting the pen from the Favorites bar, then choose Remove.
Something cool to note: Your Favorites will capture all the settings: size, color, and line stroke type. The more you use your digital bullet journal, the more you’ll see what sort of tools you gravitate towards.
Need a skinny black pen and a fat black pen? Great.
Need a collection of rainbow highlighters, all in size 7? Got it.
Need every type of eraser because you’re a hot mess? You’re covered.
Hit the “X” to hide the Favorites bar temporarily—it doesn’t delete the bar, just hides it under that cute little star icon at the bottom left.
Tools 102: Select, copy, paste, etc
The magic of digital!
Use the freeform lasso or the rectangular lasso tools to draw around something and then simply move it with the same tool.
You can also re-size things… so if you draw something really huge and want to shrink it, just draw your shape and then use the diagonal handles to re-size it.
Within the lasso tool comes a whole bunch of stuff after you tap your selection:
Style: To change the color or thickness of the tool you selected. For a more complicated drawing, this can mess things up a lot… so it’s best to stick with a selection that’s just one type of pen (like handwriting or simple drawings).
Duplicate: Duplicates it right next to the original, which is nice when you’re drawing multiples of things.
Cut: This is great for when you start to draw something on one page and then realize you want it on another page entirely.
Copy: Good for duplicating things you drew already, like a killer habit tracker. Just select your stuff with the lasso tool, tap to bring up the menu, select copy, and then tap your pencil anywhere to Paste. You can also use Paste Image to convert your drawings to a solid, un-editable image.
Convert: To convert your handwriting to typed text (probably won’t need this for your Digital Doodle Diary)
Group: To keep stuff together, likely in a doodle, so you then only have to select a piece of your drawing in order to select the whole thing in the future.
Save: To save something as a sticker (more on that below)
Delete: Buh-bye.
Tools 103: Basic menu items
Now that you understand the basic tools, here are some other ones that may come in handy.
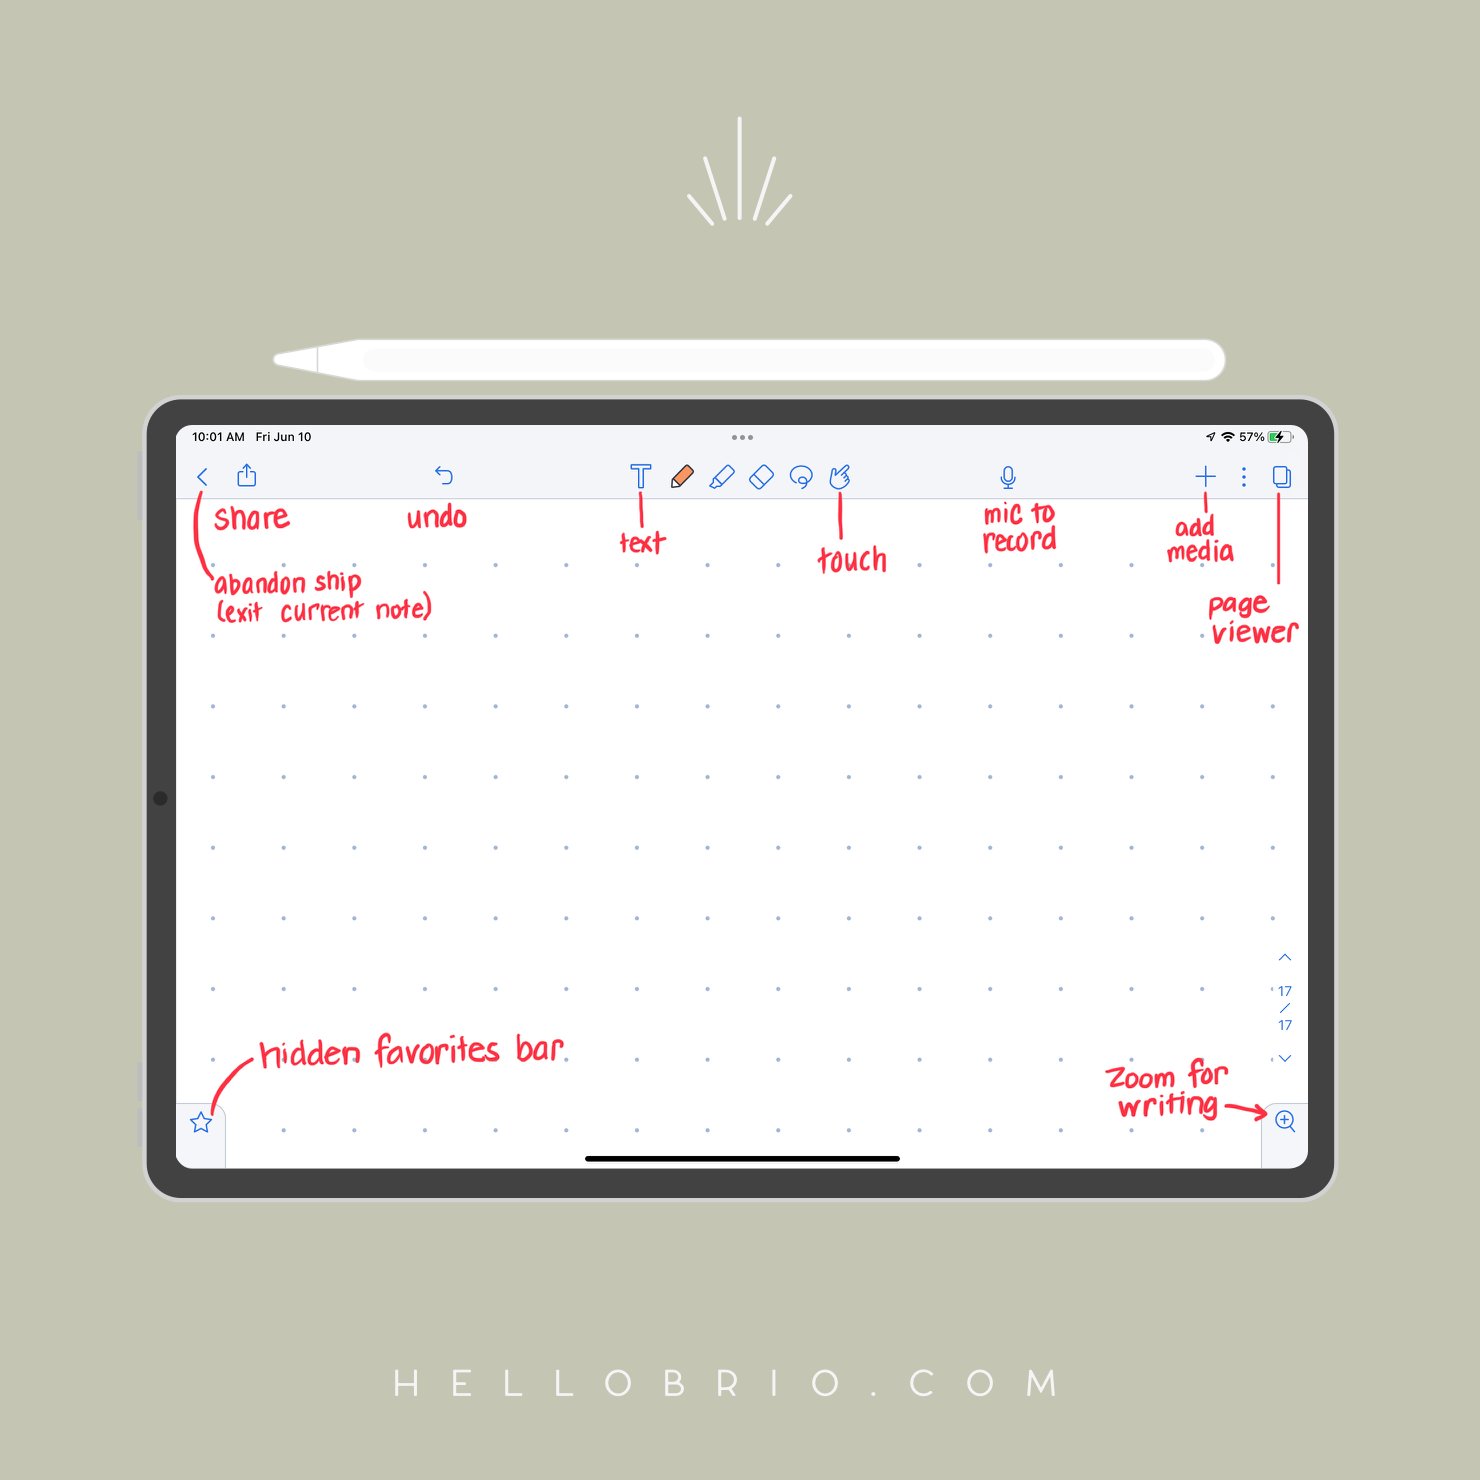
Share: The share icon at the top left helps you share it to the Notability community or Gallery… or you can export your doc to PDF or an image file, etc. It’s particularly cool because you can pretty easily just select one page out of your entire document to share, too.
Undo: The best thing about digital anything, really.
Text: Use whenever you need this. I don’t particularly like the typographic experience of Notability, which is why I only use it for bullet journaling, handwritten note-taking, and PDF form or workbook markup.
The touch icon: If you don’t have a Pencil, you can use your finger to draw and then use the touch icon (that finger pointer) to touch and swipe through pages without accidentally drawing something.
The microphone: I believe Notability was originally designed as a student’s note-taking thing, so you could record a lecture and take notes at the same time. Then you can re-watch your notes come to life as you re-listen to the lecture. Spoiler alert: I never use this.
Add media: YAS! Add images, stickers, gifs, and sticky notes here. You can also scan directly into the app here.
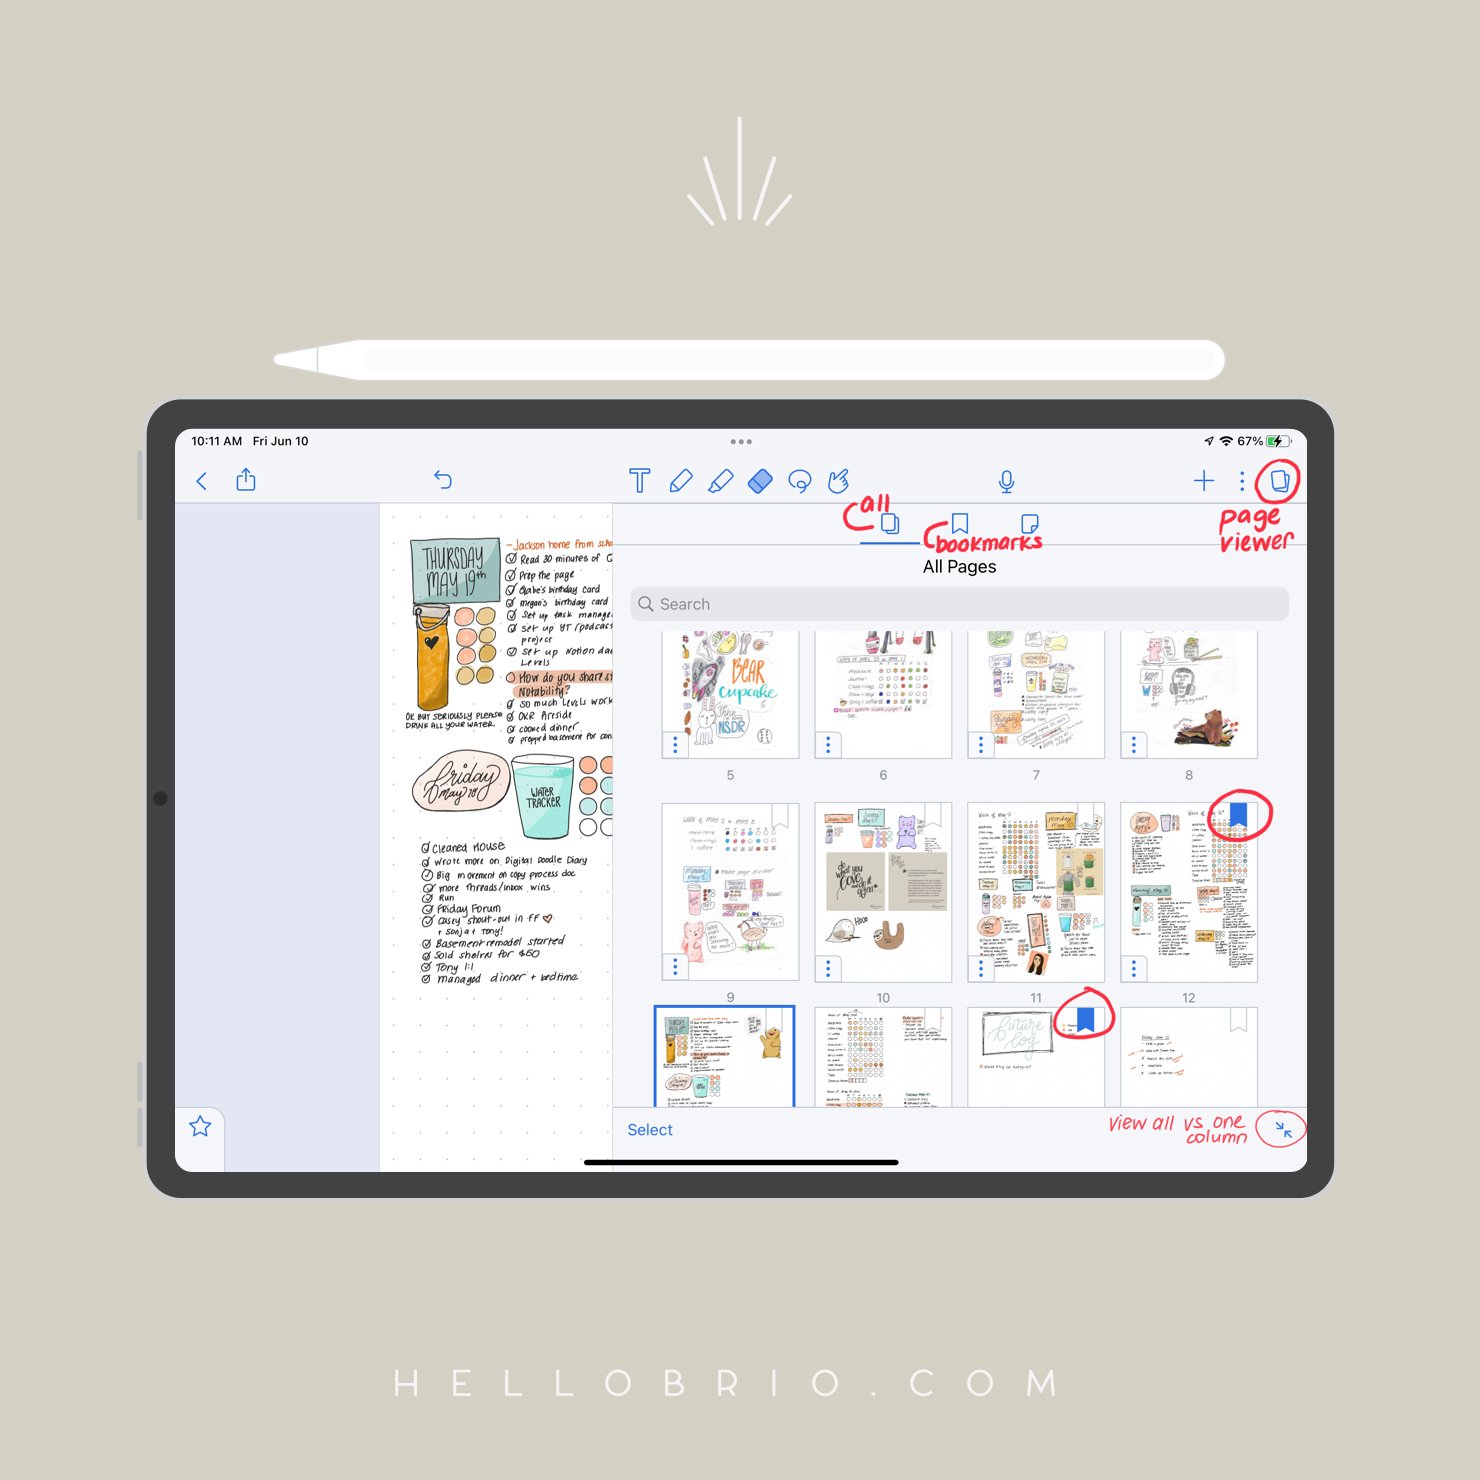
Page viewer: See all of your pages as thumbnails here, and bookmark the ones that are important to you (like if you want to bookmark a monthly goal list, for example). Then you can filter the page viewer to show only your bookmarked pages. Click the double diagonal arrows to toggle between a list view and a full-page thumbnail view.
Zoom: This tool is great for when you’re writing long-form notes and want to keep your handwriting neater; it has auto-advance and such as I outlined in point 9 of this blog post.
Now onto the fun stuff!
Take your digital doodle diary experience to the next level with shortcuts and tips!
Whether you want to beautify your experience or learn some hacks, this section will help you elevate your experience with your freeform digital bullet journal.
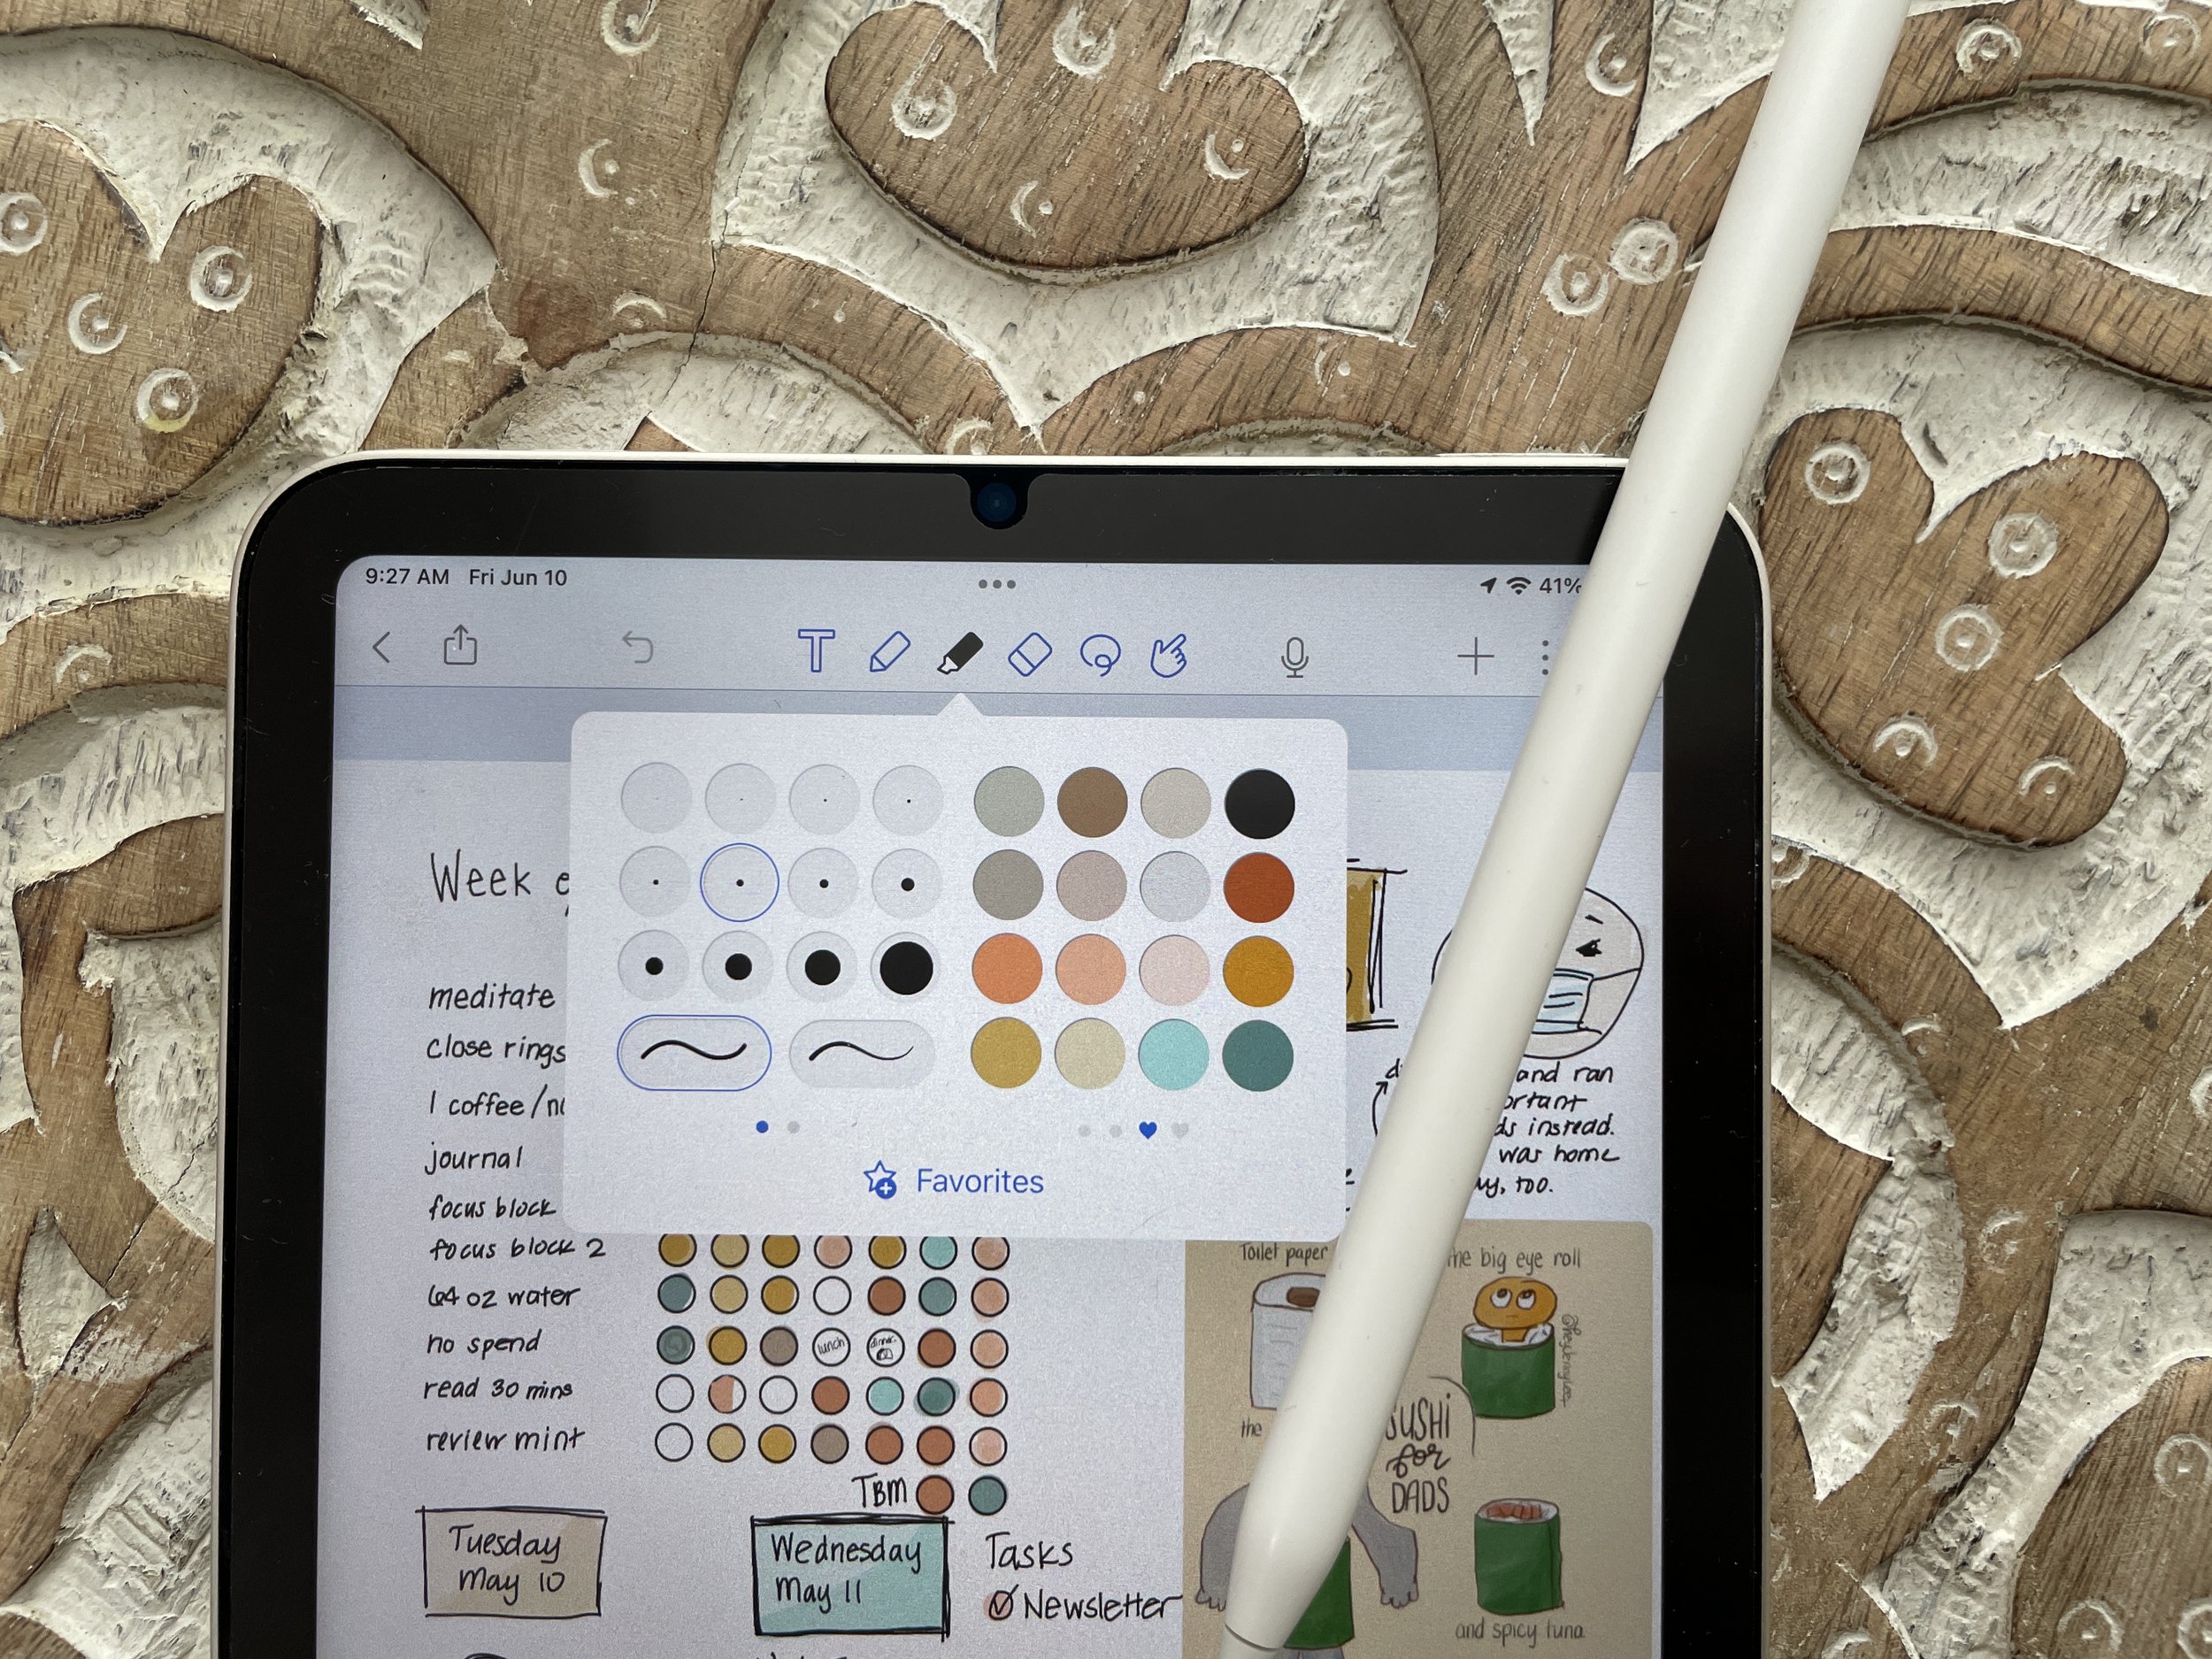
Tool magic: How to create a beautiful color palette for your digital doodle diary
Ok, so my background is in design. But one thing I’m admittedly horrible with?
Color palettes.
If you’re blessed with the eye for color harmony… great. If you’re like me and need a little help, let’s go to Pinterest.
Search for a color palette or fun image on Pinterest. It might help to add in a descriptor to match a vibe you want, like “boho color palette” or “minimal color palette,” etc.
Save the image to your camera roll or take a screenshot.
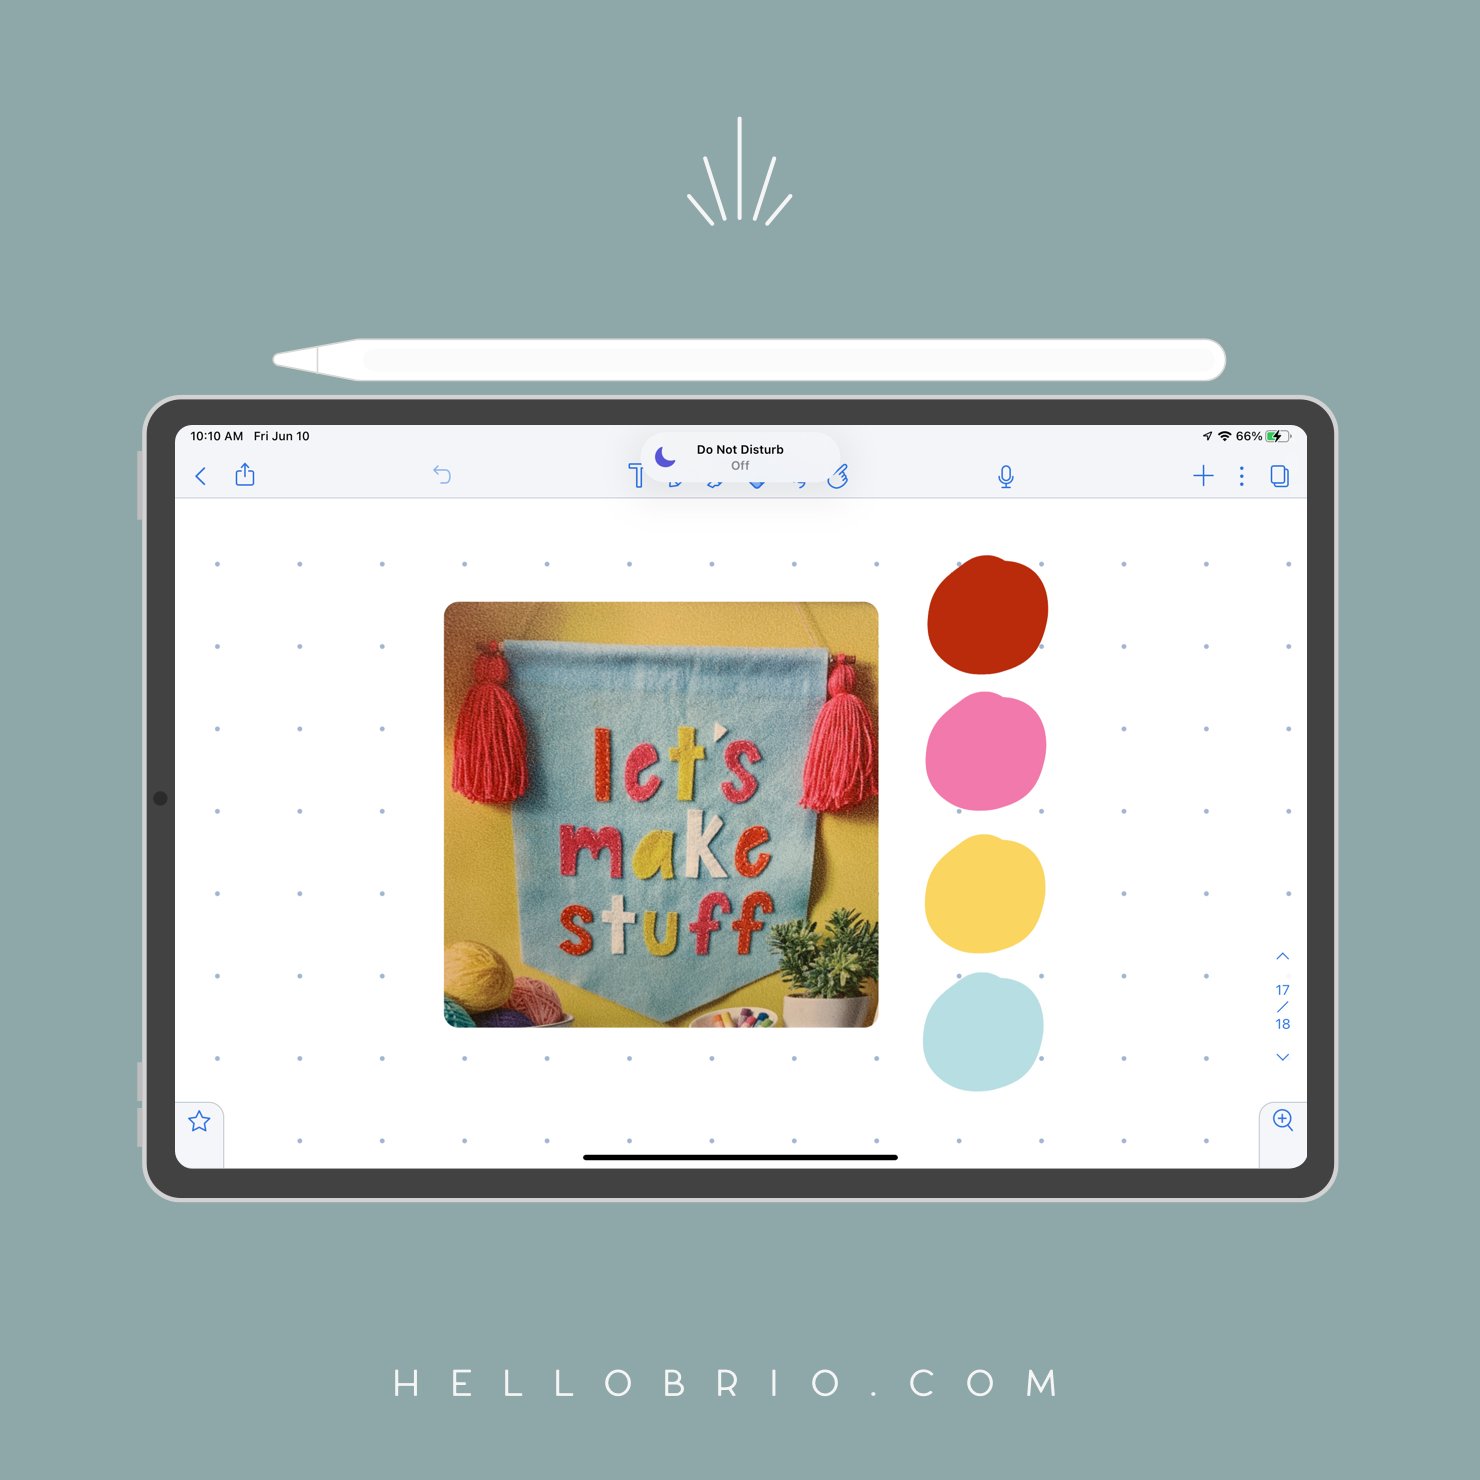
Place that color palette image into your document. In Notability, hit the plus icon and select Photo Library.
Create your color palette. Select the pen or highlighter tool. Select the eyedropper tool. Select the area of the color palette you wish to capture, then select the checkmark to add it to your palette.
Add tints and shades. If you really want to get fancy, you can add tints and shades to your color palette. I recommend bringing your color palette image into Procreate, overlaying it with white and/or black, and then bringing those overlaid screenshots back into Notability to grab those colors. (If you need more help here, let me know.)
Re-arrange your color palette as desired. You get 2 pages of 16 custom colors for a total of 32. I recommend organizing them with tints and shades of your color palette either on separate pages or right in line; whichever works best for your creative flow.
Organizing your digital bullet journal pages
When you use an analog bullet journal, you have the ability to bookmark pages with sticky notes, paper clips, or a… bookmark.
In a digital bullet journal, you don’t quite have the same luxury.
You can’t create hyperlinks in Notability for an index page or something similar as of today, but what you can do is bookmark pages using the page navigator. (Note: You can use hyperlinks in pre-created planners, but we’re talking about freeform stuff here.)
What I usually do is bookmark any page that I deem important:
Weekly habit trackers
Monthly plans
Future logs
etc
To do this, hit the page navigator, then in the All Pages view, bookmark pages by hitting the bookmark area at the top-right of each page thumbnail.
Then within the page navigator, go to the bookmark tab to see your bookmarked pages only.
Create stickers for stuff you draw all the time
One of the fun things about the digital doodle diary is you get to exercise your creative muscles more often by drawing stuff from scratch every day.
But okay, I hear you. Sometimes you might not want to draw something over and over again, especially if it’s something you need to draw every day or every week. Some ideas:
Weekly habit tracker
Daily water tracker
Progress bars
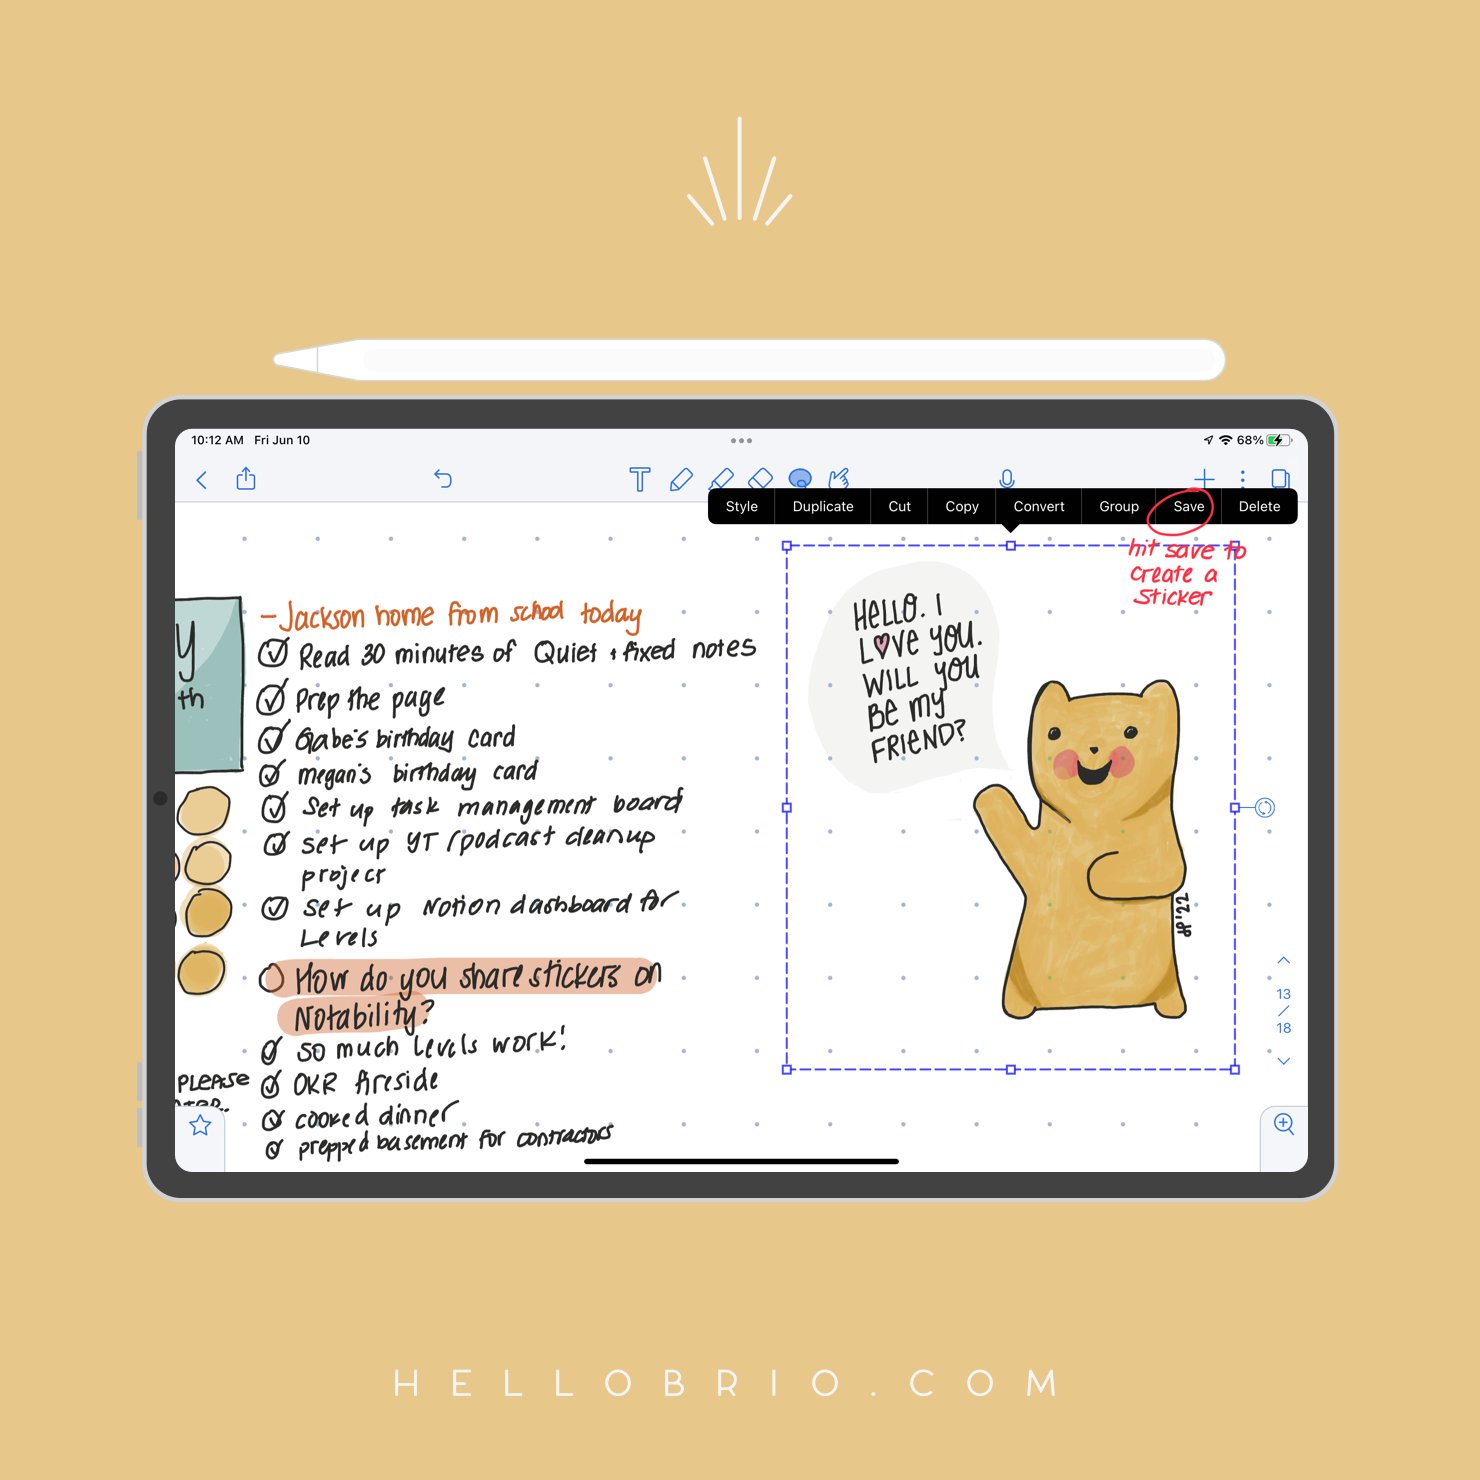
To save time, you can draw it once, then save it as a sticker to use again and again. Here’s how:
Draw your thing. I created a simple water tracker with a doodle and 8 circles to denote 8 glasses of 8oz of water.
Draw a lasso around it.
Tap it to bring up the menu bar.
Select Save.
It’ll then show up in your stickers. All done!
At the risk of repeating myself about how much I love my digital doodle diary to exercise creativity daily in a low-stakes environment, I’ll leave you with this:
If you already have an iPad and Pencil, download Notability for free, and give my Digital Doodle Diary method a try.
The Digital Doodle Diary brings a healthy dose of creativity and relaxation to my life. And with a full plate, I’m grateful to have a creative, low-stakes way to find stress relief.
If you have any questions about the Digital Doodle Diary, comment below!
You might also like…